- GitHub 源码: Masonry
- star:17000+
⭐️⭐️⭐️以下内容来源于官方源码、 README 文档、测试 Demo 或个人使用总结 !
Masonry
Masonry 是一个轻量级的布局框架,拥有自己的描述语法,采用更优雅的链式语法封装自动布局,简洁明了并具有高可读性。
Masonry 利用简化、可链接和表达式的语法发挥 Auto Layout 和 NSLayoutConstraints 的力量。支持 iOS 和 OSX Auto Layout。
总的来说,就是当你在 Interface Bulider 上使用 Auto Layout 的时候基本上是非常方便的,但是当我们的 UI 是用手写代码生成时,或是 UI 界面需要随用户交互而更改,这时候做自动布局的时候使用原生的 NSLayoutConstraints 类及其的繁琐,Masonry 用简洁的语法对 Auto Layout 进行了封装,使用相对更方便。
NSLayoutConstraints 的问题
添加一个子视图,跟随父视图的大小变化,但是与父视图边距有 10 个点的距离: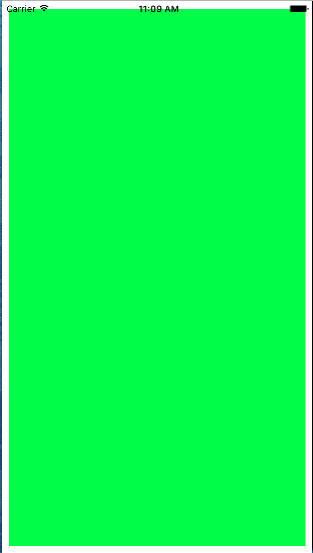
使用 NSLayoutConstraints
- (void)viewDidLoad {
    [super viewDidLoad];

    UIView *superview = self.view;
    UIView *view1 = [[UIView alloc] init];
    // 设置为NO,表示通过添加自己的约束以使用 Auto Layout 定位视图
    view1.translatesAutoresizingMaskIntoConstraints = NO;
    view1.backgroundColor = [UIColor greenColor];
    [superview addSubview:view1];

    // 指定每个边缘的插入量(正),值可以是负的到“起点”
    UIEdgeInsets padding = UIEdgeInsetsMake(10, 10, 10, 10);

    [superview addConstraints:@[

        // view1 constraints
        // view1.attribute1 = multiplier × superview.attribute2 + constant
        // view1的顶部距离父视图的顶部10px
        [NSLayoutConstraint constraintWithItem:view1
                                     attribute:NSLayoutAttributeTop
                                     relatedBy:NSLayoutRelationEqual
                                        toItem:superview
                                     attribute:NSLayoutAttributeTop
                                    multiplier:1.0
                                      constant:padding.top],
        // 左边距离10px
        [NSLayoutConstraint constraintWithItem:view1
                                     attribute:NSLayoutAttributeLeft
                                     relatedBy:NSLayoutRelationEqual
                                        toItem:superview
                                     attribute:NSLayoutAttributeLeft
                                    multiplier:1.0
                                      constant:padding.left],
        // 底部距离10px
        [NSLayoutConstraint constraintWithItem:view1
                                     attribute:NSLayoutAttributeBottom
                                     relatedBy:NSLayoutRelationEqual
                                        toItem:superview
                                     attribute:NSLayoutAttributeBottom
                                    multiplier:1.0
                                      constant:-padding.bottom],
        // 右边距离10px
        [NSLayoutConstraint constraintWithItem:view1
                                     attribute:NSLayoutAttributeRight
                                     relatedBy:NSLayoutRelationEqual
                                        toItem:superview
                                     attribute:NSLayoutAttributeRight
                                    multiplier:1
                                      constant:-padding.right],
        ]];
}
使用 Masonry
[view1 mas_makeConstraints:^(MASConstraintMaker *make) {
    make.top.equalTo(superview.mas_top).with.offset(padding.top);
    make.left.equalTo(superview.mas_left).with.offset(padding.left);
    make.bottom.equalTo(superview.mas_bottom).with.offset(-padding.bottom);
    make.right.equalTo(superview.mas_right).with.offset(-padding.right);
}];
更短的写法
[view1 mas_makeConstraints:^(MASConstraintMaker *make) {
    make.edges.equalTo(superview).with.insets(padding);
}];
Masonry 实践
下面参考 Masonry 介绍与使用实践 (快速上手 Autolayout) @里脊串的开发随笔,练习使用 Masonry。
需要的源码
- GitHub:Masonry
- GitHub:MMPlaceHolder
- GitHub:DemoMasonry
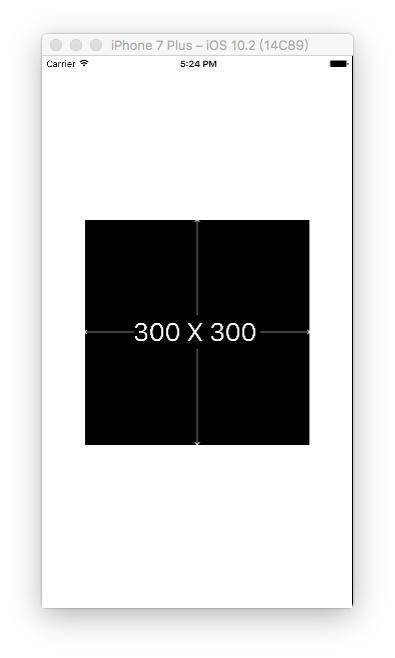
1. 居中显示一个 300*300 的 superview
UIView *superview = [UIView new];
[superview showPlaceHolder];    // 需要导入MMPlaceHolder框架
superview.backgroundColor = [UIColor blackColor];
[self.view addSubview:superview];
[superview mas_makeConstraints:^(MASConstraintMaker *make) {
    make.center.equalTo(self.view);
    make.size.mas_equalTo(CGSizeMake(300, 300));
}];
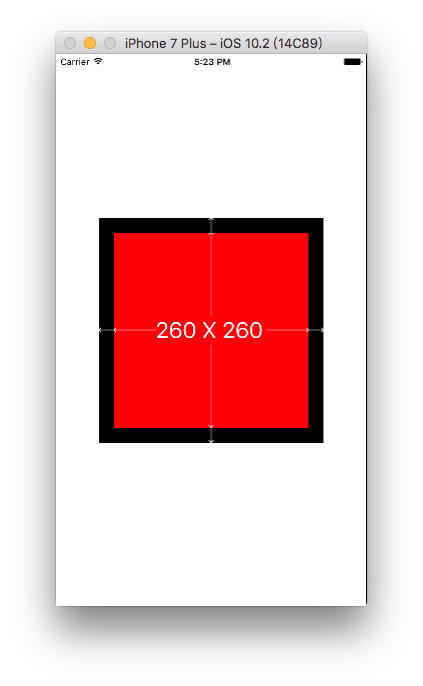
2. 让 superview1 略小于其 superview (边距为 20)
UIView *superview1 =[UIView new];
superview1.backgroundColor = [UIColor redColor];
[superview addSubview:superview1];
[superview1 mas_makeConstraints:^(MASConstraintMaker *make) {
    // 写法一
   make.edges.equalTo(superview).with.insets(UIEdgeInsetsMake(20, 20, 20, 20));

    /** 写法二
    make.top.equalTo(superview).with.offset(20);
    make.left.equalTo(superview).with.offset(20);
    make.bottom.equalTo(superview).with.offset(-20);
    make.right.equalTo(superview).with.offset(-20);
    **/

    /** 写法三
     make.top.left.bottom.and.right.equalTo(superview).with.insets(UIEdgeInsetsMake(20, 20, 20, 20));
    **/
}];
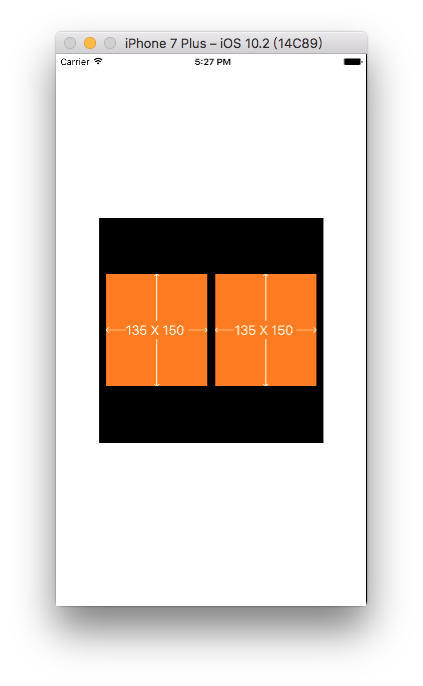
3. 让两个高度为 150 的 view 垂直居中、等宽、等间隔排列 (间隔为 10), 自动计算其宽度
UIView *superview2 =[UIView new];
superview2.backgroundColor = [UIColor orangeColor];
[superview addSubview:superview2];

UIView *superview3 =[UIView new];
superview3.backgroundColor = [UIColor orangeColor];
[superview addSubview:superview3];

int padding1 = 10;
[superview2 mas_makeConstraints:^(MASConstraintMaker *make) {
    make.centerY.mas_equalTo(superview.mas_centerY);
    make.left.equalTo(superview.mas_left).with.offset(padding1);
    make.right.equalTo(superview3.mas_left).with.offset(-padding1);
    make.height.mas_equalTo(@150);
    make.width.equalTo(superview3);
}];

[superview3 mas_makeConstraints:^(MASConstraintMaker *make) {
    make.centerY.mas_equalTo(superview.mas_centerY);
    make.left.equalTo(superview2.mas_right).with.offset(padding1);
    make.right.equalTo(superview.mas_right).with.offset(-padding1);
    make.height.mas_equalTo(@150);
    make.width.equalTo(superview2);
}];
4. 在 UIScrollView 上顺序排列一些 view 并自动计算 contentSize
UIScrollView *scrollView = [UIScrollView new];
scrollView.backgroundColor = [UIColor whiteColor];
[superview addSubview:scrollView];
[scrollView mas_makeConstraints:^(MASConstraintMaker *make) {
    make.edges.equalTo(superview).with.insets(UIEdgeInsetsMake(5, 5, 5, 5));
}];

UIView *container = [UIView new];
[scrollView addSubview:container];
[container mas_makeConstraints:^(MASConstraintMaker *make) {
    make.edges.equalTo(scrollView);
    make.width.equalTo(scrollView);
}];

int count = 10;
UIView *lastView = nil;

for (int i = 1;  i <= count; i++) {
    UIView *subView = [UIView new];
    [container addSubview:subView];
    subView.backgroundColor = [UIColor colorWithHue:(arc4random() % 256 / 256.0)
                                         saturation:(arc4random() % 128 / 256.0) + 0.5
                                         brightness:(arc4random() % 128 / 256.0) + 0.5
                                              alpha:1];

    [subView mas_makeConstraints:^(MASConstraintMaker *make) {
        make.left.and.right.equalTo(container);
        make.height.mas_equalTo(@(20 * i)); // 每个子视图的高度是20的倍数

        if (lastView) {
            // 下一个子视图的顶部 = 上一个子视图的底部
            make.top.mas_equalTo(lastView.mas_bottom);
        }else {
            // 第一次执行,lastView = nil,因此第一个子视图的顶部是容器的顶部
            make.top.mas_equalTo(container.mas_top);
        }
    }];
    lastView = subView;
}
[container mas_makeConstraints:^(MASConstraintMaker *make) {
    // 容器的底部是最后一个视图的底部
    make.bottom.equalTo(lastView.mas_bottom);
}];
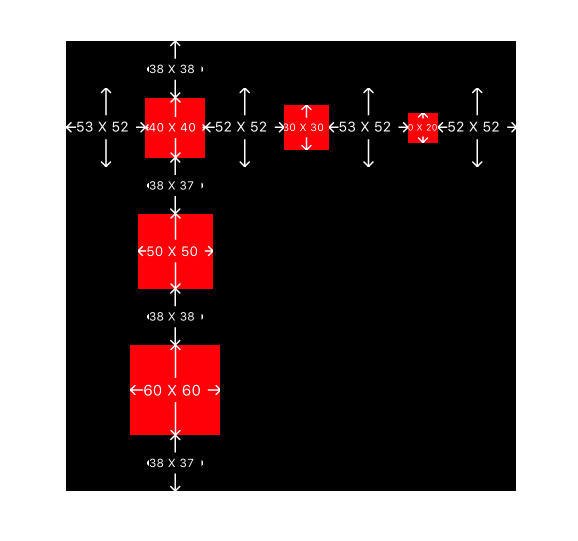
5. 横向或者纵向等间隙的排列一组 view
11/15 添加
均匀分布一组 view 推荐使用NSArray+MASAdditions.h类中的两个方法:
/**
 *  distribute with fixed spacing
 *
 *  @param axisType     which axis to distribute items along
 *  @param fixedSpacing the spacing between each item
 *  @param leadSpacing  the spacing before the first item and the container
 *  @param tailSpacing  the spacing after the last item and the container
 */
- (void)mas_distributeViewsAlongAxis:(MASAxisType)axisType withFixedSpacing:(CGFloat)fixedSpacing leadSpacing:(CGFloat)leadSpacing tailSpacing:(CGFloat)tailSpacing;

/**
 *  distribute with fixed item size
 *
 *  @param axisType        which axis to distribute items along
 *  @param fixedItemLength the fixed length of each item
 *  @param leadSpacing     the spacing before the first item and the container
 *  @param tailSpacing     the spacing after the last item and the container
 */
- (void)mas_distributeViewsAlongAxis:(MASAxisType)axisType withFixedItemLength:(CGFloat)fixedItemLength leadSpacing:(CGFloat)leadSpacing tailSpacing:(CGFloat)tailSpacing;
需要使用封装的 category 类:
- UIView+LJC.h:
#import <UIKit/UIKit.h>

/**
 横向或者纵向等间隙的排列一组view
 */
@interface UIView (LJC)

- (void) distributeSpacingHorizontallyWith:(NSArray*)views;

- (void) distributeSpacingVerticallyWith:(NSArray*)views;

@end- UIView+LJC.m:
#import "UIView+LJC.h"
#import <Masonry/Masonry.h>


@implementation UIView (LJC)


/**
 横向排列一组view

 @param views view数组
 */
- (void) distributeSpacingHorizontallyWith:(NSArray*)views
{
    NSMutableArray *spaces = [NSMutableArray arrayWithCapacity:views.count+1];

    for ( int i = 0 ; i < views.count+1 ; ++i )
    {
        UIView *v = [UIView new];
        [spaces addObject:v];
        [self addSubview:v];

        [v mas_makeConstraints:^(MASConstraintMaker *make) {
            make.width.equalTo(v.mas_height);
        }];
    }

    UIView *v0 = spaces[0];

    [v0 mas_makeConstraints:^(MASConstraintMaker *make) {
        make.left.equalTo(self.mas_left);
        make.centerY.equalTo(((UIView*)views[0]).mas_centerY);
    }];

    UIView *lastSpace = v0;
    for ( int i = 0 ; i < views.count; ++i )
    {
        UIView *obj = views[i];
        UIView *space = spaces[i+1];

        [obj mas_makeConstraints:^(MASConstraintMaker *make) {
            make.left.equalTo(lastSpace.mas_right);
        }];

        [space mas_makeConstraints:^(MASConstraintMaker *make) {
            make.left.equalTo(obj.mas_right);
            make.centerY.equalTo(obj.mas_centerY);
            make.width.equalTo(v0);
        }];

        lastSpace = space;
    }

    [lastSpace mas_makeConstraints:^(MASConstraintMaker *make) {
        make.right.equalTo(self.mas_right);
    }];

}


/**
 垂直排列一组view

 @param views view数组
 */
- (void) distributeSpacingVerticallyWith:(NSArray*)views
{
    NSMutableArray *spaces = [NSMutableArray arrayWithCapacity:views.count+1];

    for ( int i = 0 ; i < views.count+1 ; ++i )
    {
        UIView *v = [UIView new];
        [spaces addObject:v];
        [self addSubview:v];

        [v mas_makeConstraints:^(MASConstraintMaker *make) {
            make.width.equalTo(v.mas_height);
        }];
    }


    UIView *v0 = spaces[0];

    [v0 mas_makeConstraints:^(MASConstraintMaker *make) {
        make.top.equalTo(self.mas_top);
        make.centerX.equalTo(((UIView*)views[0]).mas_centerX);
    }];

    UIView *lastSpace = v0;
    for ( int i = 0 ; i < views.count; ++i )
    {
        UIView *obj = views[i];
        UIView *space = spaces[i+1];

        [obj mas_makeConstraints:^(MASConstraintMaker *make) {
            make.top.equalTo(lastSpace.mas_bottom);
        }];

        [space mas_makeConstraints:^(MASConstraintMaker *make) {
            make.top.equalTo(obj.mas_bottom);
            make.centerX.equalTo(obj.mas_centerX);
            make.height.equalTo(v0);
        }];

        lastSpace = space;
    }

    [lastSpace mas_makeConstraints:^(MASConstraintMaker *make) {
        make.bottom.equalTo(self.mas_bottom);
    }];

}

@end- 实例测试:
UIView *subView11 = [UIView new];
UIView *subView12 = [UIView new];
UIView *subView13 = [UIView new];
UIView *subView21 = [UIView new];
UIView *subView31 = [UIView new];

subView11.backgroundColor = [UIColor redColor];
subView12.backgroundColor = [UIColor redColor];
subView13.backgroundColor = [UIColor redColor];
subView21.backgroundColor = [UIColor redColor];
subView31.backgroundColor = [UIColor redColor];

[superview addSubview:subView11];
[superview addSubview:subView12];
[superview addSubview:subView13];
[superview addSubview:subView21];
[superview addSubview:subView31];

//给予不同的大小,测试结果

[subView11 mas_makeConstraints:^(MASConstraintMaker *make) {
    make.centerY.equalTo(@[subView12,subView13]); // 11、12、13 Y方向对齐
    make.centerX.equalTo(@[subView21,subView31]); // 11、21、31 X方向对齐
    make.size.mas_equalTo(CGSizeMake(40, 40));
}];

[subView12 mas_makeConstraints:^(MASConstraintMaker *make) {
    make.size.mas_equalTo(CGSizeMake(30, 30));
}];

[subView13 mas_makeConstraints:^(MASConstraintMaker *make) {
    make.size.mas_equalTo(CGSizeMake(20, 20));
}];

[subView21 mas_makeConstraints:^(MASConstraintMaker *make) {
    make.size.mas_equalTo(CGSizeMake(50, 50));
}];

[subView31 mas_makeConstraints:^(MASConstraintMaker *make) {
    make.size.mas_equalTo(CGSizeMake(60, 60));
}];

[superview distributeSpacingHorizontallyWith:@[subView11,subView12,subView13]];
[superview distributeSpacingVerticallyWith:@[subView11,subView21,subView31]];

[superview showPlaceHolderWithAllSubviews];
[superview hidePlaceHolder];
使用空白的占位 view 填充目标 view 的旁边
继续参考:Masonry 使用总结,学习使用 Masonry;
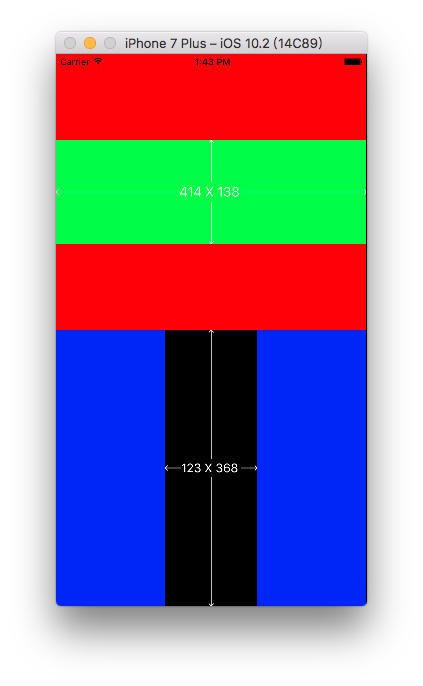
6.Masonry 的比例使用 multipliedBy
使用 multipliedBy 必须是对同一个控件本身,如果修改成相对于其它控件会导致 Crash。
UIView *topView = [UIView new];
[topView setBackgroundColor:[UIColor redColor]];
[self.view addSubview:topView];

UIView *topInnerView = [UIView new];
[topInnerView setBackgroundColor:[UIColor greenColor]];
[topInnerView showPlaceHolder];
[self.view addSubview:topInnerView];

UIView *bottomView =[UIView new];
[bottomView setBackgroundColor:[UIColor blueColor]];
[self.view addSubview:bottomView];

UIView *bottomInnerView =[UIView new];
[bottomInnerView setBackgroundColor:[UIColor blackColor]];
[bottomInnerView showPlaceHolder];
[self.view addSubview:bottomInnerView];

[topView mas_makeConstraints:^(MASConstraintMaker *make) {
    make.top.left.and.right.mas_equalTo(0);
    make.height.mas_equalTo(bottomView);
}];

[topInnerView mas_makeConstraints:^(MASConstraintMaker *make) {
    make.left.and.right.mas_equalTo(0);
    make.width.mas_equalTo(topInnerView.mas_height).multipliedBy(3);
    make.center.mas_equalTo(topView);
}];

[bottomView mas_makeConstraints:^(MASConstraintMaker *make) {
    make.left.bottom.and.right.mas_equalTo(0);
    make.height.mas_equalTo(topView);
    make.top.mas_equalTo(topView.mas_bottom);
}];

[bottomInnerView mas_makeConstraints:^(MASConstraintMaker *make) {
    make.top.and.bottom.mas_equalTo(bottomView);
    make.height.mas_equalTo(bottomInnerView.mas_width).multipliedBy(3);
    make.center.mas_equalTo(bottomView);
}];
7. 使用 priority 优先级属性来做简单的动画
.priority allows you to specify an exact priority
.priorityHigh equivalent to UILayoutPriorityDefaultHigh
.priorityMedium is half way between high and low
.priorityLow equivalent to UILayoutPriorityDefaultLow
- 先为 blueView 设置属性:
@interface ViewController ()

@property (nonatomic,strong) UIView *blueView;

@end
2. 创建视图并设置约束:
// 红色视图
UIView *redView = [UIView new];
redView.backgroundColor = [UIColor redColor];
[self.view addSubview:redView];

// 蓝色视图
self.blueView = [UIView new];
self.blueView.backgroundColor = [UIColor blueColor];
[self.view addSubview:self.blueView];

// 黄色视图
UIView *yellowView = [UIView new];
yellowView.backgroundColor = [UIColor yellowColor];
[self.view addSubview:yellowView];

// ————红色视图约束————
[redView mas_makeConstraints:^(MASConstraintMaker *make) {
    make.left.mas_equalTo(self.view.mas_left).with.offset(20);
    make.bottom.mas_equalTo(self.view.mas_bottom).with.offset(-80);
    make.height.mas_equalTo(50);
}];

// ————蓝色视图约束————
[self.blueView mas_makeConstraints:^(MASConstraintMaker *make) {
    make.left.mas_equalTo(redView.mas_right).with.offset(40);
    make.bottom.width.and.height.with.height.mas_equalTo(redView);
}];

// ————黄色视图约束————
[yellowView mas_makeConstraints:^(MASConstraintMaker *make) {
      // 默认满足高优先级约束
    make.left.mas_equalTo(self.blueView.mas_right).with.offset(40);
    make.right.mas_equalTo(self.view.mas_right).with.offset(-20);
    make.bottom.width.and.height.mas_equalTo(redView);

    //** priority设置为250,最高1000(默认)**
    make.left.mas_equalTo(redView.mas_right).with.offset(20).priority(250);
}];
3. 点击屏幕移除蓝色视图方法:
- (void)touchesBegan:(NSSet<UITouch *> *)touches withEvent:(UIEvent *)event {
    [self.blueView removeFromSuperview];
    [UIView animateWithDuration:1.0 animations:^{
        [self.view layoutIfNeeded];
    }];
}
注释:黄色视图的 left 属性分别设置了两个约束,一个相对于蓝色视图的高优先级约束:make.left.mas_equalTo(self.blueView.mas_right).with.offset(40);
另一个相对于红色视图的低优先级约束:make.left.mas_equalTo(redView.mas_right).with.offset(20).priority(250);
当蓝色视图存在时,两个约束同时存在,为避免约束冲突,系统默认满足高优先级的约束;
当点击屏幕,蓝色视图被移除后,低优先级的约束就会生效。
8.Masonry 更新约束方法:mas_updateConstraints
如果你只想更新约束的常量值,则可以使用更方便的方法:mas_updateConstraints 而不是 mas_makeConstraints。
创建一个 Button 属性、scale 属性用于记录放大比例:
@interface ViewController ()
@property (nonatomic,strong) UIButton *growingButton;
@property (nonatomic,assign) CGFloat scale;
@end
创建 Button 实例:
<!–hexoPostRenderEscape:
self.growingButton = [UIButton buttonWithType:UIButtonTypeSystem];
[self.growingButton setTitle:@"点我放大" forState:UIControlStateNormal];
self.growingButton.layer.borderColor = UIColor.greenColor.CGColor;
self.growingButton.layer.borderWidth = 3;
[self.growingButton addTarget:self action:@selector(onGrowButtonTaped:) forControlEvents:UIControlEventTouchUpInside];
[self.view addSubview:self.growingButton];
self.scale = 1.0;
[self.growingButton mas_makeConstraints:^(MASConstraintMaker *make) {:hexoPostRenderEscape–>
make.center.mas_equalTo(self.view);
// 初始宽、高为100,优先级最低
make.width.height.mas_equalTo(100 * self.scale);
// 最大放大到整个view
make.width.and.height.lessThanOrEqualTo(self.view);
}]
点击 Button 方法:
- (void)onGrowButtonTaped:(UIButton *)sender {
 self.scale += 1.0;

 //告诉self.view约束需要更新
 [self.view setNeedsUpdateConstraints];

 //调用此方法告诉self.view检测是否需要更新约束,若需要则更新。下面添加的动画效果才起作用
 [self.view updateConstraintsIfNeeded];

 [UIView animateWithDuration:0.3 animations:^{
     [self.view layoutIfNeeded];
 }];
}
更新约束:
<!–hexoPostRenderEscape:
// 这是Apple推荐的添加/更新约束的地方
// 此方法可以被多次调用,以响应 setNeedsUpdateConstraints
// 如果您需要触发对约束的更新,可以在UIKit内部或你的代码中调用该方法
(void)updateViewConstraints {:hexoPostRenderEscape–>
[self.growingButton mas_updateConstraints:^(MASConstraintMaker *make) {
}];//这里写需要更新的约束,不用更新的约束将继续存在,并不会被取代 make.width.and.height.mas_equalTo(100*self.scale);
[super updateViewConstraints];// //根据Apple要求,super方法应该在方法结束时调用
}
代码执行顺序:
-[ViewController viewDidLoad]
-[ViewController createGrowingButton]
mas_makeConstraints
-[ViewController updateViewConstraints]
mas_updateConstraints
点击按钮
-[ViewController onGrowButtonTaped:]
-[ViewController updateViewConstraints]
mas_updateConstraints
点击按钮
-[ViewController onGrowButtonTaped:]
-[ViewController updateViewConstraints]
mas_updateConstraints
更新约束和布局的相关方法
- 关于 UIView 重新布局相关的 API,主要用以下三个 API:
- (void)setNeedsLayout  标记为需要在下一个周期重新布局
- (void)layoutIfNeeded  查看当前视图是否被标记需要重新布局,有则在内部调用layoutSubviews方法立即进行重新布局
- (void)layoutSubviews 重写当前方法,在内部完成重新布局操作,不要直接调用,如果需要强制更新布局,调用 setNeedsLayout()- 关于更新约束布局相关的 API,主要用以下四个 API:
- (void)setNeedsUpdateConstraints  标记需要进行重新布局,系统会调用 updateConstraints()方法,修改多个约束后调用该方法批量更新有助于提升性能
- (BOOL)needsUpdateConstraints     当前是否需要重新布局,内部会判断当前有没有被标记的约束
- (void)updateConstraintsIfNeeded  调用此方法,如果有标记为需要重新布局的约束,则立即进行重新布局,内部会调用  updateConstraints方法
- (void)updateConstraints          重写此方法,内部实现自定义布局过程
9.Masonry 的重写约束:mas_remakeConstraints
mas_updateConstraintsis useful for updating a set of constraints, but doing anything beyond updating constant values can get exhausting. That’s wheremas_remakeConstraintscomes in.
mas_remakeConstraintsis similar tomas_updateConstraints, but instead of updating constant values, it will remove all of its constraints before installing them again. This lets you provide different constraints without having to keep around references to ones which you want to remove.
- 创建一个 Button 属性、isExpanded 属性用于记录按钮状态:
@property (nonatomic,strong) UIButton *growingButton;
@property (nonatomic,assign) BOOL isExpanded;- 创建 Button 实例:
self.isExpanded = NO;
self.growingButton = [UIButton buttonWithType:UIButtonTypeSystem];
[self.growingButton setTitle:@"点我展开" forState:UIControlStateNormal];
self.growingButton.layer.borderColor = UIColor.greenColor.CGColor;
self.growingButton.layer.borderWidth = 3;
self.growingButton.backgroundColor = [UIColor redColor];
[self.growingButton addTarget:self action:@selector(onGrowButtonTaped:) forControlEvents:UIControlEventTouchUpInside];
[self.view addSubview:_growingButton];

[self.growingButton mas_makeConstraints:^(MASConstraintMaker *make) {
    make.top.and.left.mas_equalTo(100);
    make.bottom.mas_equalTo(-350);
    make.right.mas_equalTo(-100);
}];- 点击 Button 方法:
- (void)onGrowButtonTaped:(UIButton *)sender {
    self.isExpanded = !self.isExpanded;
    if (!self.isExpanded) {
        [self.growingButton setTitle:@"点我展开" forState:UIControlStateNormal];
    }else {
        [self.growingButton setTitle:@"点我收起" forState:UIControlStateNormal];
    }

    [self.view setNeedsUpdateConstraints];
    [self.view updateConstraintsIfNeeded];
    [UIView animateWithDuration:0.3 animations:^{
        [self.view layoutIfNeeded];
    }];
}- 更新约束:
- (void)updateViewConstraints {
    NSLog(@"%s",__func__);
    // 这里使用update也能实现效果,而remark会将之前的约束全部移除,然后重新添加
    __weak typeof (self)weakself = self;
    [self.growingButton mas_remakeConstraints:^(MASConstraintMaker *make) {
        // 重写全部约束
        if (weakself.isExpanded) {
            make.top.and.left.mas_equalTo(0);
            make.bottom.mas_equalTo(10);
            make.right.mas_equalTo(0);
        }else {
            make.top.and.left.mas_equalTo(100);
            make.bottom.mas_equalTo(-350);
            make.right.mas_equalTo(-100);
        }
    }];
    [super updateViewConstraints];
}
实现结果:
其他
By default, macros which support autoboxing are prefixed with mas_. Unprefixed versions are available by defining MAS_SHORTHAND_GLOBALS before importing Masonry.
—— 摘自 Masonary:README.md
- 为了增加代码的可读性这里有两个简化代码的宏:
#define MAS_SHORTHAND和#define MAS_SHORTHAND_GLOBALS
MAS_SHORTHAND:只要在导入 Masonry 主头文件之前定义这个宏,那么以后在使用 Masonry 框架中的属性和方法的时候,就可以省略 mas_前缀
MAS_SHORTHAND_GLOBALS:只要在导入 Masonry 主头文件之前定义这个宏,那么就可以让equalTo函数接收基本数据类型,内部会对基本数据类型进行包装注意:这两个宏如果想有效使用,必须要在添加 Masonry 头文件之前导入进去。在没有增加宏
MAS_SHORTHAND_GLOBALS时,下面这句是会报错的。
make.top.equalTo(42); --> make.top.equalTo([NSNumber numberWithInt:42]); —— 摘自 Masonry 使用总结
注意:有时候写约束语法的时候 with 经常会不小心写成 width, 就像这样:
make.bottom.mas_equalTo(self.view.mas_bottom).width.offset(-80);于是会报这样的错误:
Attributes should be chained before defining the constraint relation.
属性应该在定义约束关系之前链接.
记得仔细查找这种错误并改正。
参考文章
- iOS AutoLayout 与 AutoSizing:自动布局,想说爱你真的好难
- Masonry 介绍与使用实践 (快速上手 Autolayout) @里脊串的开发随笔 ⭐️⭐️⭐️
- Masonry 使用总结 ⭐️⭐️⭐️
- 简书:iOS 自动布局框架 - Masonry 详解 @刘小壮
- Masonry: 使用纯代码进行 iOS 应用的 autolayout 自适应布局 @伯乐在线
- iOS 自适应前段库 - Masonry 的使用