对象继承关系
UIButton 类本身定义继承 UIControl ,描述了在 iOS 上所有用户界面控件的常见基本行为。反过来, UIControl 类继承 UIView ,给在屏幕显示的对象提供常用功能。UIView 继承于 UIResponder,允许它响应用户输 入、手势。最后,也是最重要的,UIResponder 继承 NSObject,图 1-3 所示。

Documentation and API Reference
UIButton 对象是一个视图,它用于执行你的自定义代码以响应用户交互。
概述
当你触摸点击按钮或选择具有焦点的按钮时,该按钮就会执行被附加上的任何操作。 你可以使用文本标签,图像或两者同时使用来传达按钮的功能。 按钮的外观是可配置的,因此你可以使用色调按钮或格式化的标题来匹配应用程序的设计。 你可以通过编程方式或使用 Interface Builder 向界面添加按钮。

当添加一个按钮到你的界面上时,请执行以下步骤:
- 创建按钮时,设置按钮的类型。
- 设置标题或图片,并根据内容适当调整按钮的大小。
- 为按钮设置一个或多个目标 - 动作(Target-Action)方法。
- 设置自动布局(Auto Layout)规则来控制界面中按钮的大小和位置。
- 提供辅助功能信息和本地化字符串。
关于基本视图行为的更多信息,请参阅:View Programming Guide for iOS.
响应按钮触摸事件
当用户触摸点击按钮时,按钮使用 Target-Action 设计模式监听 APP。并不是直接处理触摸事件,你可以向按钮分配操作方法,并指定哪些事件触发对你的方法的调用。 在运行时,该按钮可处理所有传入的触摸事件并调用您的方法作为响应。
你使用 addTarget:action:forControlEvents: 方法连接按钮到动作方法上,或者在 Interface Builder 建立连接。动作方法的签名采用清单 1 中列出的三种形式之一。选择提供您需要响应按钮轻敲的信息的表单。
Listing 1 Action methods for buttons:
- (IBAction)doSomething;
- (IBAction)doSomething:(id)sender;
- (IBAction)doSomething:(id)sender forEvent:(UIEvent*)event;
配置按钮外观
按钮的类型决定了它的基本外观和行为,在创建按钮时,使用 buttonWithType: 方法指定按钮的类型。创建按钮之后,你无法再更改它的类型了。最常用的类型是 UIButtonTypeSystem 、**UIButtonTypeCustom (默认)**,请在合适时使用其它类型。
注意
要配置应用程序中所有按钮的外观,请使用外观代理对象。 UIButton 类实现了
appearance类方法,您可以使用它来获取应用程序中所有按钮的外观代理。
按钮状态
按钮有五个状态定义其外观:default(默认),highlighted(高亮),focused(聚焦),selected(选中)和 disabled(禁用)。 当您将一个按钮添加到界面时,它最初处于 default(默认)状态,这意味着该按钮已启用(enabled),并且用户未与其进行交互。 当用户与按钮进行交互时,其状态将更改为其他值。 例如,当用户点击带有标题的按钮时,按钮将改变到 highlighted(高亮)状态。
以编程方式或在 Interface Builder 中配置按钮时,可以分别为每个状态指定属性。 在 Interface Builder 中,使用 “属性” 检查器中的 “状态配置” 控件选择适当的状态,然后配置其他属性。 如果不为特定状态指定属性,则 UIButton 类提供合理的默认行为。 例如,禁用的按钮通常变暗,并且在轻拍时不显示高亮。 该类的其他属性,如 adjustImageWhenHighlighted 和 adjustImageWhenDisabled 属性,可以在特定情况下更改默认行为。
内容
按钮的内容由你指定的标题字符串或图像组成。你指定的内容是用于配置被按钮所拥有的 UILabel 和 UIImageView 对象。你可以使用 titleLabel 或 imageView 属性配置这些对象,或者直接对它们赋值。按钮也有背景颜色,它位于您指定的内容后面。很可能同时指定按钮的图片和标题,它会导致下图的结果。你可以使用指定的属性访问按钮的当前内容。

当设置按钮的内容时,你必须指定每个状态下的标题、图片和外观属性。如果你不为某个特定状态自定义内容,该按钮使用与默认状态相关联的值,并添加任何适当的自定义配置。例如,在按钮高亮状态下,如果没有提供自定义图像,则基于图像的按钮将在默认图像的上方绘制高亮。
色调颜色
你可以通过 tintColor 属性指定自定义按钮的色调。该属性会设置按钮图片和文本的颜色。如果你没有明确设置色调,那么按钮使用它父类的色调。
边缘插入量
使用 insets 来添加或删除你自定义(或系统的)按钮内容周围空间,你可以单独为按钮标题(titleEdgeInsets)、图片(imageEdgeInsets)或同时为标题和图片(contentEdgeInsets)指定 insets 值。应用时,insets 影响了按钮的相应内容矩形,由 Auto Layout 引擎用于确定按钮的位置。
你应该没有理由去调整 info,contact 或指示器按钮的边缘插入量。
Interface Builder 属性
表一列出了 Interface Builder 中按钮配置的核心属性。
| 属性 | 描述 |
|---|---|
| Type | 按钮的类型。该属性决定了许多其他按钮属性的默认设置。该类型属性无法在运行时被改变,但是你可以使用 buttonType 属性访问它。 |
| State Config | 状态选择器。 在此控件中选择一个值后,按钮属性的更改将适用于指定的状态。 |
| Title | 按钮的标题。你可以用纯字符串或属性字符串指定按钮的标题 |
| (Title Font and Attributes) | 适用于按钮标题字符串的字体和其他属性。具体的配置选项取决于你对按钮的标题使用纯字符串还是属性字符串。对于纯字符串来说,你可以设置字体、文本颜色和阴影颜色。对于属性字符串来说,你可以指定对齐方式,文本方向,缩进,连字号等许多选项。 |
| Image | 按钮的前景图片。通常来说,你可以使用模板图片指定按钮的前景,但是你可以在 XCode 项目中指定任何图片。 |
| Background | 按钮的背景图片。按钮的背景图片是展示在它的标题和前景图片后面的。 |
表 2 列出了影响按钮外观的属性
| 属性 | 描述 |
|---|---|
| Shadow Offset | 按钮阴影的偏移和行为。阴影只会影响标题字符串。 当按钮状态更改为或高亮状态时,启用 “高亮状态” 选项上的 “反转” 选项可更改阴影的高亮。 使用编程方式配置偏移量使用按钮的 titleLabel 对象的 shadowOffset 属性。配置高亮行为使用 reversesTitleShadowWhenHighlighted 属性。 |
| Drawing | 按钮的绘图行为。 当高亮时显示触摸 showsTouchWhenHighlighted 属性开启时, 该按钮向用户触摸的按钮的部分添加白色光泽。 当高亮时调整图片 adjustsImageWhenHighlighted 属性开启时。高亮状态时,安妮图片变暗。 当禁用时调整图片 adjustsImageWhenDisabled 属性开启时, 当按钮被禁用时,图像变暗。 |
| Line Break | 按钮文本的打断显示选项。 使用此属性来定义按钮的标题如何修改以适应可用空间。 |
表 3 列出了按钮的边缘插入量属性。使用边缘插入按钮更改按钮内容的矩形。
| 属性 | 描述 |
|---|---|
| Edge | 边缘插入配置。 您可以为按钮的整体内容,其标题及其图像指定单独的边缘插入。 |
| Inset | 插入值。 正值缩小相应的边缘,使其更接近按钮的中心。 负值展开边缘,将其从按钮的中心移开。运行时使用 contentEdgeInsets、titleEdgeInsets 和 imageEdgeInsets 属性访问这些值。 |
有关按钮的继承的 Interface Builde r 属性的信息,参阅 UIControl 和 UIView。
国际化
要使按钮国际化,请为按钮的标题文本指定一个本地化的字符串。 (您也可以根据需要定位按钮的图像。)
使用故事板构建界面时,请使用 Xcode 的基本国际化功能来配置项目支持的本地化。 当您添加本地化时,Xcode 将为该本地化创建一个字符串文件。 以编程方式配置接口时,请使用系统的内置支持来加载本地化字符串和资源。 有关国际化您的界面的更多信息,参阅 Internationalization and Localization Guide。
辅助功能
默认情况下可以使用按钮。 按钮的默认辅助功能特征是按钮和用户交互启用。
当在设备上启用 VoiceOver 时,可访问性标签,特征和提示将会发送给用户。 按钮的标题覆盖其无障碍标签;即使您为标签设置了自定义值,VoiceOver 会说出标题的值。 当用户点击按钮一次时,VoiceOver 会显示此信息。 例如,当用户点击 “相机” 中的 “选项” 按钮时,VoiceOver 会说出以下内容:
- “选项。按钮。显示其他相机选项”
有关使 iOS 控件可访问的更多信息,请参阅 UIControl 中的辅助功能信息。 有关使您的界面可访问的一般信息,请参阅 Accessibility Programming Guide for iOS.
UIButton 的使用
初始化按钮
+ (instancetype)buttonWithType:(UIButtonType)buttonType;UIButtonType
这是个枚举类型,用于指定按钮风格
| UIButtonType | 描述 |
|---|---|
| UIButtonTypeCustom | 无按钮风格。 |
| UIButtonTypeSystem | 系统风格按钮,例如导航栏和工具栏中显示的那些。 |
| UIButtonTypeDetailDisclosure | 详细说明按钮。 |
| UIButtonTypeInfoLight | 浅色背景的信息按钮。 |
| UIButtonTypeInfoDark | 深色背景的信息按钮 |
| UIButtonTypeContactAdd | 添加按钮 |
| UIButtonTypeRoundedRect = UIButtonTypeSystem | (失效)圆角矩形样式按钮 |
示例:
// UIButtonTypeCustom
UIButton *button1 = [UIButton buttonWithType:UIButtonTypeCustom];
button1.frame = CGRectMake(150, 50, 50, 50);
button1.backgroundColor = [UIColor turquoiseColor];
[button1 setTitle:@"button1" forState:UIControlStateNormal];
[self.view addSubview:button1];

// UIButtonTypeSystem
UIButton *button2 = [UIButton buttonWithType:UIButtonTypeSystem];
button2.frame = CGRectMake(150, 120, 50, 50);
[button2 setTitle:@"button2" forState:UIControlStateNormal];
[self.view addSubview:button2];

// UIButtonTypeDetailDisclosure
UIButton *button3 = [UIButton buttonWithType:UIButtonTypeDetailDisclosure];
button3.frame = CGRectMake(150, 190, 50, 50);
[self.view addSubview:button3];

// UIButtonTypeInfoLight
UIButton *button4 = [UIButton buttonWithType:UIButtonTypeInfoLight];
button4.frame = CGRectMake(150, 260, 50, 50);
[self.view addSubview:button4];

// UIButtonTypeInfoDark
UIButton *button5 = [UIButton buttonWithType:UIButtonTypeInfoDark];
button5.frame = CGRectMake(150, 330, 50, 50);
[self.view addSubview:button5];

// UIButtonTypeContactAdd
UIButton *button6 = [UIButton buttonWithType:UIButtonTypeContactAdd];
button6.frame = CGRectMake(150, 400, 50, 50);
[self.view addSubview:button6];

// UIButtonTypeRoundedRect = UIButtonTypeSystem
UIButton *button7 = [UIButton buttonWithType:UIButtonTypeRoundedRect];
button7.frame = CGRectMake(150, 470, 50, 50);
[button7 setTitle:@"button7" forState:UIControlStateNormal];
[self.view addSubview:button7];
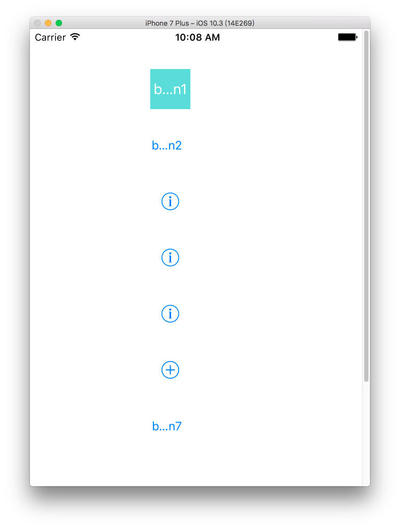
iOS 10.3 下:
设置按钮内容
// 设置标题,假定为单行。
- (void)setTitle:(NSString *)title forState:(UIControlState)state;

// 设置标题颜色,默认为不透明白色。
- (void)setTitleColor:(nullable UIColor *)color forState:(UIControlState)state;

// 设置标题阴影颜色,默认 50% 黑色。
- (void)setTitleShadowColor:(nullable UIColor *)color forState:(UIControlState)state;

// 设置图片,不同状态下的图片大小应该相同
- (void)setImage:(nullable UIImage *)image forState:(UIControlState)state;

// 设置背景图片
- (void)setBackgroundImage:(nullable UIImage *)image forState:(UIControlState)state;

// 设置标题
- (void)setAttributedTitle:(nullable NSAttributedString *)title forState:(UIControlState)state;
UIControlState
该类也是一个枚举类型,用于设置按钮状态
typedef NS_OPTIONS(NSUInteger, UIControlState) {
    UIControlStateNormal       = 0,                          // 正常状态
    UIControlStateHighlighted  = 1 << 0,                  // 高亮状态
    UIControlStateDisabled     = 1 << 1,                  // 禁用状态
    UIControlStateSelected     = 1 << 2,                  // 选中状态
    UIControlStateFocused NS_ENUM_AVAILABLE_IOS(9_0) = 1 << 3, // 仅适用于屏幕支持对焦时(iOS新加入 应该和3D Touch有关)
    UIControlStateApplication  = 0x00FF0000,              // 可用于应用程序使用的附加标志
    UIControlStateReserved     = 0xFF000000               // 标记保留供内部框架使用
};
示例代码:
// UIControlStateHighlighted
UIButton *button2 = [UIButton buttonWithType:UIButtonTypeSystem];
button2.frame = CGRectMake(150, 120, 100, 50);
[button2 setTitle:@"高亮状态" forState:UIControlStateHighlighted];
[button2 setHighlighted:YES];
[self.view addSubview:button2];

// UIControlStateDisabled
UIButton *button3 = [UIButton buttonWithType:UIButtonTypeSystem];
button3.frame = CGRectMake(150, 190, 100, 50);
[button3 setTitle:@"禁用状态" forState:UIControlStateDisabled];
[button3 setEnabled:NO];
[self.view addSubview:button3];

// UIControlStateSelected
UIButton *button4 = [UIButton buttonWithType:UIButtonTypeSystem];
button4.frame = CGRectMake(150, 260, 100, 50);
[button4 setTitle:@"选中状态" forState:UIControlStateSelected];
[button4 setSelected:YES];
[self.view addSubview:button4];
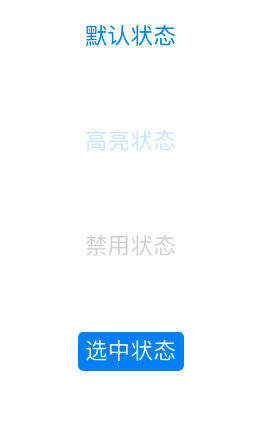
iOS 10.3 下:
添加、移除点击事件
- (void)addTarget:(nullable id)target action:(SEL)action forControlEvents:(UIControlEvents)controlEvents;

- (void)removeTarget:(nullable id)target action:(nullable SEL)action forControlEvents:(UIControlEvents)controlEvents;
使用示例:
[button1 addTarget:self
            action:@selector(butClick:)
  forControlEvents:UIControlEventTouchUpInside];

// ...

// 调用的方法,用来响应按钮的点击事件
- (void)butClick:(id)button {
    // do something
}
UIControlEvents
UIControlEventTouchDown
单点触摸按下事件:用户点触屏幕,或者又有新手指落下的时候。

UIControlEventTouchDownRepeat
多点触摸按下事件,点触计数大于1:用户按下第二、三、或第四根手指的时候。

UIControlEventTouchDragInside
当一次触摸在控件窗口内拖动时。

UIControlEventTouchDragOutside
当一次触摸在控件窗口之外拖动时。

UIControlEventTouchDragEnter
当一次触摸从控件窗口之外拖动到内部时。

UIControlEventTouchDragExit
当一次触摸从控件窗口内部拖动到外部时。

UIControlEventTouchUpInside
所有在控件之内触摸抬起事,一般用于按钮。

UIControlEventTouchUpOutside
所有在控件之外触摸抬起事件(点触必须开始与控件内部才会发送通知)。

UIControlEventTouchCancel
所有触摸取消事件,即一次触摸因为放上了太多手指而被取消,或者被上锁或者电话呼叫打断。

UIControlEventTouchChanged
当控件的值发生改变时,发送通知。用于滑块、分段控件、以及其他取值的控件。你可以配置滑块控件何时发送通知,在滑块被放下时发送,或者在被拖动时发送。

UIControlEventEditingDidBegin
当文本控件中开始编辑时发送通知。

UIControlEventEditingChanged
当文本控件中的文本被改变时发送通知。

UIControlEventEditingDidEnd
当文本控件中编辑结束时发送通知。

UIControlEventEditingDidOnExit
当文本控件内通过按下回车键(或等价行为)结束编辑时,发送通知。

UIControlEventAlltouchEvents
通知所有触摸事件。

UIControlEventAllEditingEvents
通知所有关于文本编辑的事件。

UIControlEventAllEvents
通知所有事件。
userInteractionEnabled 与 enabled 的区别
self.btn1.enabled = NO;
self.btn1.userInteractionEnabled = NO;
相同点
这两个方法都可以将按钮设置为禁用状态,阻止接受用户触摸事件及键盘响应。
不同点
enabled = NO会使按钮的状态变为UIControlStateDisabled,而userInteractionEnabled = NO不会。enabled是UIControl的属性(虽然UIButton是UICotrol的子类,但是这两个方法都能用,因为UICotrol又是UIView的子类),而userInteractionEnabled是UIView、UIImageView、UILabel的属性。- 如果使用时,同时设置了这两个方法,那么,先设置的方法奏效。
关于 tintColor
tintColor 是 iOS7.0 引入的一个 UIView 的属性,该属性会设置按钮图片和文本的颜色。
tintColor 具有 继承、重写、传播 的特点。
继承:只要一个 UIView 的 subview 没有明确指定
tintColor,那么这个 UIView 的tintColor就会被它的 subview 所继承!在一个 App 中,最顶层的 view 就是 window,因此,只要修改 window 的tintColor,那么所有 view 的tintColor就都会跟着改变。(这种说法其实并不严谨,请耐心继续看下去 ^_^)。重写:如果明确指定了某个 view 的
tintColor, 那么这个 view 就不会继承其 superview 的tintColor。而且自此,这个 view 的 subview 的tintColor会发生改变。传播:一个 view 的
tintColor的改变会立即向下传播,影响其所有的 subview,直至它的一个 subview 明确指定了tintColor为止。——UIView 并没想的那么简单 - tintColor 揭秘
⚠️ 如果创建的是 UIButtonTypeCustom 类型的按钮,再去设置 tintColor 属性是无效的。

将这张灰色的图片设置为按钮图片:
// 创建一个系统类型按钮
UIButton *button2 = [UIButton buttonWithType:UIButtonTypeSystem];
button2.frame = CGRectMake(80, 180, 180, 180);
// 设置按钮的背景颜色为蓝色
button2.backgroundColor = [UIColor skyBlueColor];
// 设置按钮的色调颜色为绿色
button2.tintColor = [UIColor seafoamColor];
// 设置按钮的标签文字
[button2 setTitle:@"Tap it" forState:UIControlStateNormal];
// 设置按钮图片
UIImage *image = [UIImage imageNamed:@"picture_button"];
[button2 setImage:image forState:UIControlStateNormal];
// 绑定按钮的点击动作
[button2 addTarget:self
            action:@selector(butClick:)
  forControlEvents:UIControlEventTouchUpInside];
[self.view addSubview:button2];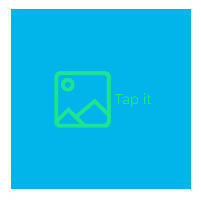
运行结果发现按钮的图片、文字都会变成绿色。
另外:
- 如果我们想指定整个 APP 的 tint color,则可以通过设置 window 的 tint color。这样同一个 window 下的所有子视图都会继承此 tint color。
- 如果你是用 storyboard 创建界面的,那么只要在入口控制器的 File Inspector 中修改一下 Global Tint 即可。
设置圆角

代码实现:
button.clipsToBounds = YES;     // 如果子视图的范围超出了父视图的边界,那么超出的部分就会被裁剪掉
button.layer.cornerRadius = 5;    //这里的5是你想设置的圆角大小,比如是一个40*40的正方形,那个设置成20就是一个圆,以此类推
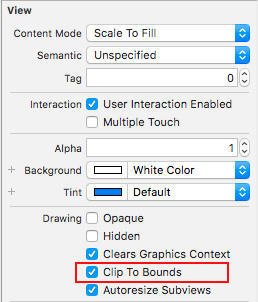
StoryBoard / Xib 中设置 UIButton 圆角:
工具区域 → Attribute inspector → View 勾选 Clip To Bounds
![]()
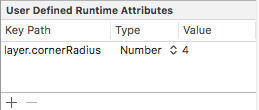
工具区域 → Identity inspector → User Define Runtime Attributes 添加如下:
![]()
设置边框

代码实现:
// 创建一个按钮
UIButton *button3 = [UIButton buttonWithType:UIButtonTypeSystem];
button3.frame = CGRectMake(80, 450, 150, 30);
// 设置按钮的背景色
button3.backgroundColor = [UIColor icebergColor];
// 设置按钮的前景色
button3.tintColor = [UIColor skyBlueColor];
// 设置按钮的标签文字
[button3 setTitle:@"Tap it" forState:UIControlStateNormal];
// 给按钮添加边框效果
[button3.layer setMasksToBounds:YES];
// 设置层的圆角半径
[button3.layer setCornerRadius:5.0];
// 设置边框的宽度
[button3.layer setBorderWidth:2.0];
// 设置边框的颜色
CGColorSpaceRef colorSpace = CGColorSpaceCreateDeviceRGB();
CGColorRef colorRef = CGColorCreate(colorSpace, (CGFloat[]){ 56/255.0, 237/255.0, 56/255.0, 1 });
[button3.layer setBorderColor:colorRef];
[self.view addSubview:button3];
按钮高亮效果
需求如下:

代码实现:
UIButton *submitButton = [UIButton buttonWithType:UIButtonTypeCustom];
// 默认标题
NSDictionary *attributes = @{
                     NSFontAttributeName:[UIFont systemFontOfSize:18],
          NSForegroundColorAttributeName:[UIColor whiteColor] };
NSAttributedString *title =[[NSAttributedString alloc] initWithString:@"提交" attributes:attributes];
[submitButton setAttributedTitle:title forState:UIControlStateNormal];
// 设置背景颜色
// 使用 YYKit 组件实现将颜色生成图片效果
[submitButton setBackgroundImage:[UIImage imageWithColor:HexColor(@"#108EE9")]
                         forState:UIControlStateNormal];
[submitButton setBackgroundImage:[UIImage imageWithColor:HexColor(@"#1284D6")]
                         forState:UIControlStateHighlighted];
// 设置圆角
submitButton.clipsToBounds = YES;
submitButton.layer.cornerRadius = 5;
[submitButton addTarget:self
                 action:@selector(submitInfoAction:)
       forControlEvents:UIControlEventTouchUpInside];
// 将按钮添加到视图上
[self.view addSubview:submitButton];
效果展示:

小按钮高亮镂空效果
代码实现:
UIButton *button = [UIButton buttonWithType:UIButtonTypeCustom];
// 默认标题
NSDictionary *attributes1 = @{
                      NSFontAttributeName:[UIFont systemFontOfSize:13],
           NSForegroundColorAttributeName:HexColor(@"#108EE9")
                             };
NSAttributedString *normalTitle =[[NSAttributedString alloc] initWithString:@"示例" attributes:attributes1];
[button setAttributedTitle:normalTitle
                  forState:UIControlStateNormal];
// 高亮标题
NSDictionary *attributes2 = @{
                     NSFontAttributeName:[UIFont systemFontOfSize:13],
          NSForegroundColorAttributeName:[UIColor whiteColor]
                             };
NSAttributedString *highlightedTitle = [[NSAttributedString alloc] initWithString:@"示例" attributes:attributes2];
[button setAttributedTitle:highlightedTitle
                       forState:UIControlStateHighlighted];
// 高亮背景颜色
[button setBackgroundImage:[UIImage imageWithColor:HexColor(@"#108EE9")]
                       forState:UIControlStateHighlighted];
[button.layer setCornerRadius:3];
[button.layer setMasksToBounds:YES];
[button.layer setBorderWidth:1];
[button.layer setBorderColor:[HexColor(@"#108EE9") CGColor]]
// Target-Action
[button addTarget:self
           action:@selector(buttonClickUpHandler:)
 forControlEvents:UIControlEventTouchUpInside];
// 将按钮添加到视图上
[self.view addSubview:button];
效果展示:

图文结合
通过 setTitle:forState: 和 setImage:forState: 这两个方法设置了 UIButton 的 标题和图片之后,可以通过以下两个属性访问代表 UIButton 中标题和图片的两个子控件:
@property(nullable, nonatomic,readonly,strong) UILabel     *titleLabel;
@property(nullable, nonatomic,readonly,strong) UIImageView *imageView;
UIControlContentVerticalAlignment
UIControlContentVerticalAlignment控制的是UIButton的image和title在竖直方向的对齐方式,其值有top、bottom、center、fill。当指定为fill时,图片会在竖直方向被拉伸填满UIButton的高度。
// UIButton的image和title在竖直方向的对齐方式
typedef NS_ENUM(NSInteger, UIControlContentVerticalAlignment) {
    UIControlContentVerticalAlignmentCenter  = 0,
    UIControlContentVerticalAlignmentTop     = 1,
    UIControlContentVerticalAlignmentBottom  = 2,
    UIControlContentVerticalAlignmentFill    = 3,
};| UIControlContentVerticalAlignment | 效果 |
|---|---|
| UIControlContentVerticalAlignmentCenter | 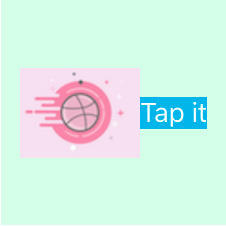 |
| UIControlContentVerticalAlignmentTop | 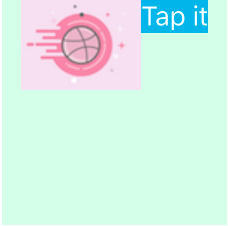 |
| UIControlContentVerticalAlignmentBottom | 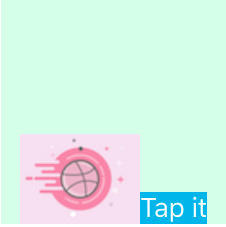 |
| UIControlContentVerticalAlignmentFill | 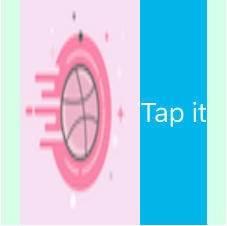 |
UIControlContentHorizontalAlignment
UIControlContentHorizontalAlignment控制的则是水平方向的对齐方式。其值有left、right、center、fill。当指定为fill时,图片并没有在水平方向将UIButton充满,而是在右侧留出了一定距离,这个距离应该是title的宽度,但是title实际上也没有乖乖的跑到那段空隙去,而是和image重叠了
typedef NS_ENUM(NSInteger, UIControlContentHorizontalAlignment) {
    UIControlContentHorizontalAlignmentCenter = 0,
    UIControlContentHorizontalAlignmentLeft   = 1,
    UIControlContentHorizontalAlignmentRight  = 2,
    UIControlContentHorizontalAlignmentFill   = 3,
};| UIControlContentHorizontalAlignment | 效果 |
|---|---|
| UIControlContentHorizontalAlignmentCenter | 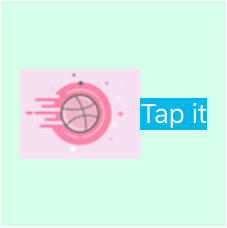 |
| UIControlContentHorizontalAlignmentLeft | 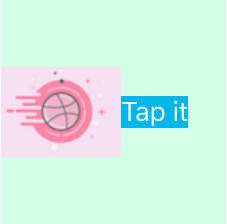 |
| UIControlContentHorizontalAlignmentRight | 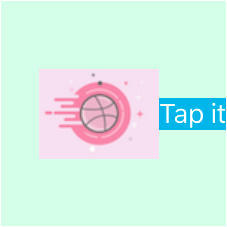 |
| UIControlContentHorizontalAlignmentFill | 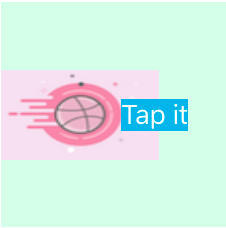 |
- UIEdgeInsets
使用 insets 来添加或删除你自定义(或系统的)按钮内容周围空间,你可以单独为按钮标题(
titleEdgeInsets)、图片(imageEdgeInsets)或同时为标题和图片(contentEdgeInsets)指定 insets 值。应用时,insets 影响了按钮的相应内容矩形,由 Auto Layout 引擎用于确定按钮的位置。
@property(nonatomic)          UIEdgeInsets contentEdgeInsets;
@property(nonatomic)          UIEdgeInsets titleEdgeInsets;
@property(nonatomic)          UIEdgeInsets imageEdgeInsets;
默认按钮布局
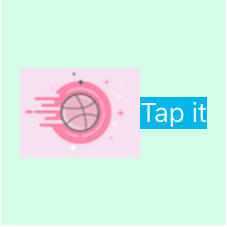
创建一个图片 + 标题的按钮:
// 创建自定义类型按钮
UIButton *button = [UIButton buttonWithType:UIButtonTypeCustom];
button.frame = CGRectMake(80, 180, 150, 150);
// 设置按钮的背景颜色
button.backgroundColor = [UIColor honeydewColor];
// 设置按钮的标签文字
[button setTitle:@"Tap it" forState:UIControlStateNormal];
button.titleLabel.backgroundColor =  [UIColor skyBlueColor];
// 设置按钮图片
UIImage *image = [UIImage imageNamed:@"buttonImage"];
[button setImage:image forState:UIControlStateNormal];
[self.view addSubview:button];默认情况下:图片在左边而文字在右边,而且整体水平和垂直居中。
这是一个 UIButton 范畴(Category) 类,用于处理图文结合
- UIButton+ImageTitleStyle.h 文件
#import <UIKit/UIKit.h>

@interface UIButton (ImageTitleStyle)

//上下居中,图片在上,文字在下
- (void)verticalCenterImageAndTitle:(CGFloat)spacing;
- (void)verticalCenterImageAndTitle; //默认6.0

//左右居中,文字在左,图片在右
- (void)horizontalCenterTitleAndImage:(CGFloat)spacing;
- (void)horizontalCenterTitleAndImage; //默认6.0

//左右居中,图片在左,文字在右
- (void)horizontalCenterImageAndTitle:(CGFloat)spacing;
- (void)horizontalCenterImageAndTitle; //默认6.0

//文字居中,图片在左边
- (void)horizontalCenterTitleAndImageLeft:(CGFloat)spacing;
- (void)horizontalCenterTitleAndImageLeft; //默认6.0

//文字居中,图片在右边
- (void)horizontalCenterTitleAndImageRight:(CGFloat)spacing;
- (void)horizontalCenterTitleAndImageRight; //默认6.0

@end- UIButton+ImageTitleStyle.m 文件
#import "UIButton+ImageTitleStyle.h"

@implementation UIButton (ImageTitleStyle)

#pragma mark - 上下居中,图片在上,文字在下
- (void)verticalCenterImageAndTitle:(CGFloat)spacing
{
    // get the size of the elements here for readability
    CGSize imageSize = self.imageView.frame.size;
    CGSize titleSize = self.titleLabel.frame.size;

    // lower the text and push it left to center it
    self.titleEdgeInsets = UIEdgeInsetsMake(0.0, - imageSize.width, - (imageSize.height + spacing/2), 0.0);

    // the text width might have changed (in case it was shortened before due to
    // lack of space and isn't anymore now), so we get the frame size again
    titleSize = self.titleLabel.frame.size;

    // raise the image and push it right to center it
    self.imageEdgeInsets = UIEdgeInsetsMake(- (titleSize.height + spacing/2), 0.0, 0.0, - titleSize.width);
}

- (void)verticalCenterImageAndTitle
{
    const int DEFAULT_SPACING = 6.0f;
    [self verticalCenterImageAndTitle:DEFAULT_SPACING];
}


#pragma mark - 左右居中,文字在左,图片在右
- (void)horizontalCenterTitleAndImage:(CGFloat)spacing
{
    // get the size of the elements here for readability
    CGSize imageSize = self.imageView.frame.size;
    CGSize titleSize = self.titleLabel.frame.size;

    // lower the text and push it left to center it
    self.titleEdgeInsets = UIEdgeInsetsMake(0.0, - imageSize.width, 0.0, imageSize.width + spacing/2);

    // the text width might have changed (in case it was shortened before due to
    // lack of space and isn't anymore now), so we get the frame size again
    titleSize = self.titleLabel.frame.size;

    // raise the image and push it right to center it
    self.imageEdgeInsets = UIEdgeInsetsMake(0.0, titleSize.width + spacing/2, 0.0, - titleSize.width);
}

- (void)horizontalCenterTitleAndImage
{
    const int DEFAULT_SPACING = 6.0f;
    [self horizontalCenterTitleAndImage:DEFAULT_SPACING];
}

#pragma mark - 左右居中,图片在左,文字在右
- (void)horizontalCenterImageAndTitle:(CGFloat)spacing;
{
    // get the size of the elements here for readability
    //    CGSize imageSize = self.imageView.frame.size;
    //    CGSize titleSize = self.titleLabel.frame.size;

    self.titleEdgeInsets = UIEdgeInsetsMake(0.0,  0.0, 0.0,  - spacing/2);
    self.imageEdgeInsets = UIEdgeInsetsMake(0.0, - spacing/2, 0.0, 0.0);
}

- (void)horizontalCenterImageAndTitle;
{
    const int DEFAULT_SPACING = 6.0f;
    [self horizontalCenterImageAndTitle:DEFAULT_SPACING];
}

#pragma mark - 文字居中,图片在左边
- (void)horizontalCenterTitleAndImageLeft:(CGFloat)spacing
{
    // get the size of the elements here for readability
    //    CGSize imageSize = self.imageView.frame.size;
    //    CGSize titleSize = self.titleLabel.frame.size;

    self.imageEdgeInsets = UIEdgeInsetsMake(0.0, - spacing, 0.0, 0.0);
}

- (void)horizontalCenterTitleAndImageLeft
{
    const int DEFAULT_SPACING = 6.0f;
    [self horizontalCenterTitleAndImageLeft:DEFAULT_SPACING];
}

#pragma mark - 文字居中,图片在右边
- (void)horizontalCenterTitleAndImageRight:(CGFloat)spacing
{
    // get the size of the elements here for readability
    CGSize imageSize = self.imageView.frame.size;
    CGSize titleSize = self.titleLabel.frame.size;

    // lower the text and push it left to center it
    self.titleEdgeInsets = UIEdgeInsetsMake(0.0, - imageSize.width, 0.0, 0.0);

    // the text width might have changed (in case it was shortened before due to
    // lack of space and isn't anymore now), so we get the frame size again
    titleSize = self.titleLabel.frame.size;

    // raise the image and push it right to center it
    self.imageEdgeInsets = UIEdgeInsetsMake(0.0, titleSize.width + imageSize.width + spacing, 0.0, - titleSize.width);
}

- (void)horizontalCenterTitleAndImageRight
{
    const int DEFAULT_SPACING = 6.0f;
    [self horizontalCenterTitleAndImageRight:DEFAULT_SPACING];
}
1. 上下居中,图片在上,文字在下
[button verticalCenterImageAndTitle:10.0f];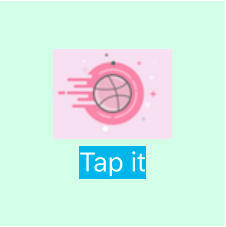
2. 左右居中,文字在左,图片在右
[button horizontalCenterTitleAndImage:10.0f];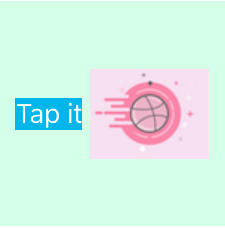
3. 左右居中,图片在左,文字在右
[button horizontalCenterImageAndTitle:10.0f];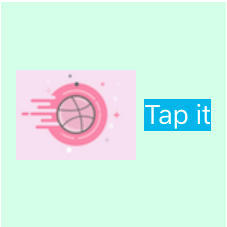
4.5.
【文字居中,图片在左边】和【文字居中,图片在右边】这两个方法显示时还有点问题。
不知道是不是设置了 Button 的 frame 使其有了固定大小的原因,先放着。
通过布局子视图方法:
当 UIButton 是固定大小时,使用上面的方法无法设置按钮中的图片相对于整个按钮的大小。
- 图片在上、文字在下
- (void) layoutSubviews {
    [super layoutSubviews];
    // 修改button内image和label的位置
    self.imageView.y = self.height * 0.15;
    self.imageView.width = self.width * 0.5;
    self.imageView.height = self.imageView.width;
    self.imageView.centerX = self.width * 0.5;

    self.titleLabel.x = 0;
    self.titleLabel.y = self.imageView.bottom;
    self.titleLabel.width = self.width;
    self.titleLabel.height = self.height - self.imageView.bottom;
}
显示/隐藏密码按钮
- (UIButton *)showPasswordButton {
    if (!_showPasswordButton) {
        _showPasswordButton = [UIButton buttonWithType:UIButtonTypeCustom];
        [_showPasswordButton setImage:[UIImage imageNamed:@"login_pwd_hide"]
                             forState:UIControlStateNormal];
        [_showPasswordButton setImage:[UIImage imageNamed:@"login_pwd_show"]
                             forState:UIControlStateSelected];
        [_showPasswordButton setSelected:NO];
        [_showPasswordButton addTarget:self
                                action:@selector(showPasswordButtonDidClicked:)
                      forControlEvents:UIControlEventTouchUpInside];
    }
    return _showPasswordButton;
}

- (void)showPasswordButtonDidClicked:(id)sender {
    self.passwordTextField.secureTextEntry = !self.passwordTextField.secureTextEntry;
    [self.showPasswordButton setSelected:!self.passwordTextField.secureTextEntry];
}
参考
- UIKit 之 UIButton 篇
- UIButton 控件
- iOS UI 基础控件之 UIButton
- 详解 UIView 的 Tint Color 属性
- UIButton 实现各种图文结合的效果以及原理
- 理解 UIButton 的各种 EdgeInsets
