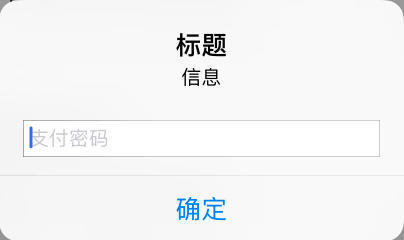
支付类应用通常都需要输入 6 位支付密码,有的是用 AlertView 的方式实现的,例如在 iPhone 的 App Store 中下载应用,有时会弹窗让你输入密码,界面大概是这样的:
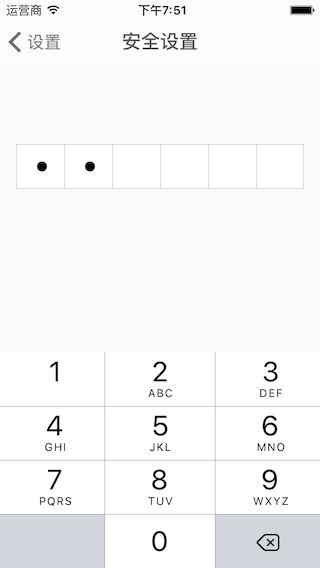
还有一种类似这样的,把输入框放在单独的页面上:
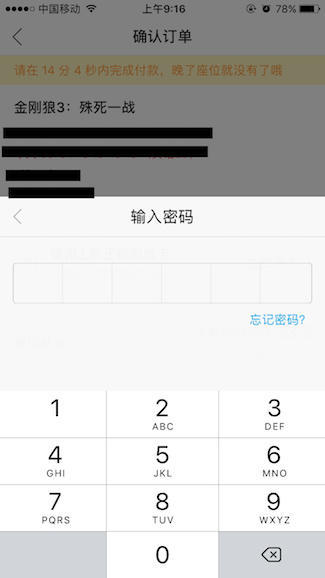
支付宝微信做的是类似半模态视图的界面(下面的是淘票票的输入密码界面):
网上搜寻了许久,找了个最接近第三种方式的 Demo :
- GitHub:chernyog/CYPasswordView
- GitHub:chernyog/CYPasswordView_Block
CYPasswordView_Block 源码解析
一、概述
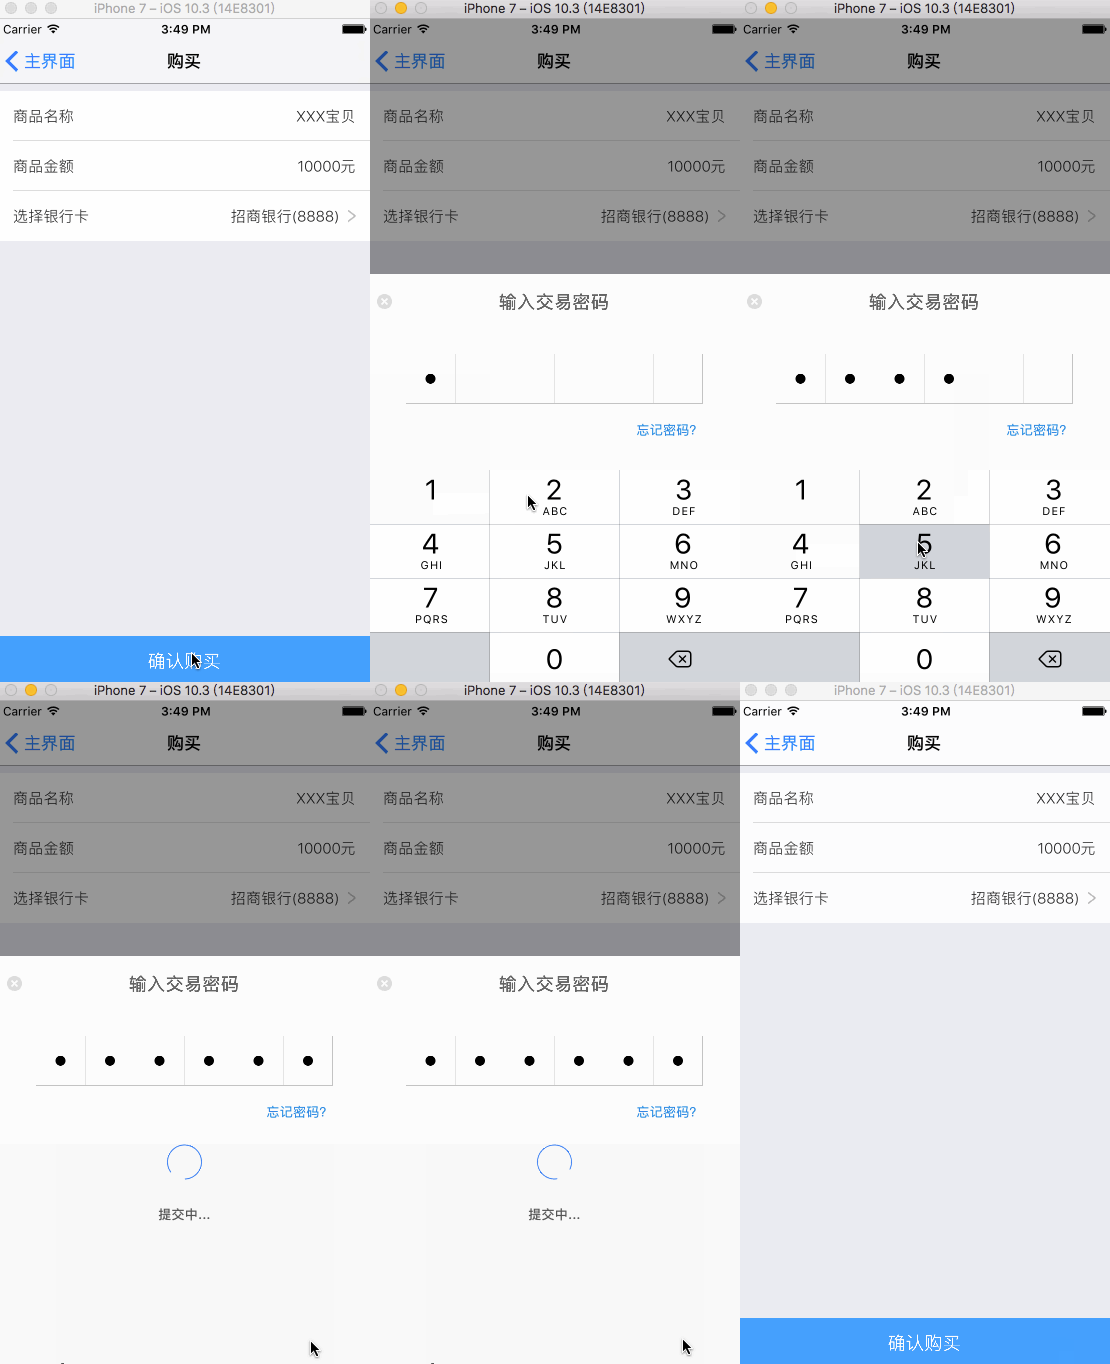
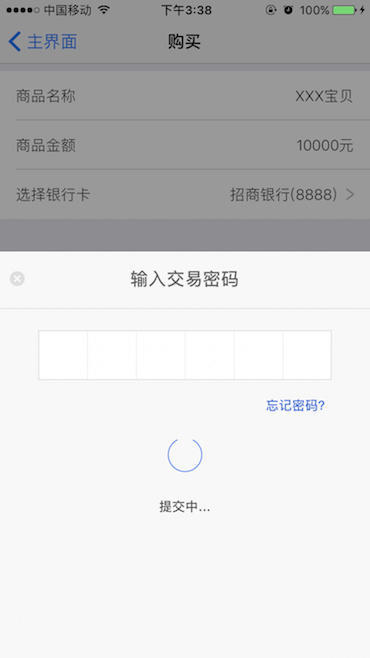
CYPasswordView_Block 是一个模仿支付宝输入支付密码的密码框 (这是一个用 block 传递事件的版本,避免了因多级页面切换并且都弹出密码框而造成通知监听混乱的 bug)
二、使用方法
- (IBAction)showPasswordView:(id)sender {

    WS(weakSelf);
    // 实例化 CYPasswordView 对象
    self.passwordView = [[CYPasswordView alloc] init];
    // 弹出密码框
    [self.passwordView showInView:self.view.window];
    self.passwordView.loadingText = @"提交中...";
    // 关闭密码框
    self.passwordView.cancelBlock = ^{
        [weakSelf cancel];
    };
    // 忘记密码
    self.passwordView.forgetPasswordBlock = ^{
        [weakSelf forgetPWD];
    };
    // 密码输入完成的回调
    self.passwordView.finish = ^(NSString *password) {
        [weakSelf.passwordView hidenKeyboard];
        [weakSelf.passwordView startLoading];
        CYLog(@"cy ========= 发送网络请求  pwd=%@", password);
        dispatch_after(dispatch_time(DISPATCH_TIME_NOW, (int64_t)(kRequestTime * NSEC_PER_SEC)), dispatch_get_main_queue(), ^{
            flag = !flag;
            if (flag) {
                // 购买成功,跳转到成功页
                [weakSelf.passwordView requestComplete:YES message:@"购买成功……"];
                [weakSelf.passwordView stopLoading];
                dispatch_after(dispatch_time(DISPATCH_TIME_NOW, (int64_t)(kDelay * NSEC_PER_SEC)), dispatch_get_main_queue(), ^{
                    [weakSelf.passwordView hide];
                });
            } else {
                // 购买失败,跳转到失败页
                [weakSelf.passwordView requestComplete:NO];
                [weakSelf.passwordView stopLoading];
                dispatch_after(dispatch_time(DISPATCH_TIME_NOW, (int64_t)(kDelay * NSEC_PER_SEC)), dispatch_get_main_queue(), ^{
                    [weakSelf.passwordView hide];
                });
            }
        });
    };
}
三、实现方式
需要哪些控件元素?

照着图片看需要哪些控件元素,自上而下,从左往右看:
- 灰色的背景图层 coverView, 用于覆盖上一个视图;
- 占据半个屏幕的输入框视图,该视图上有:
- 标题文本;
- 关闭按钮、忘记密码按钮;
- 带 6 个格子的密码输入框;
- 加载图片、加载文本
如何显示密码?
- 键盘上输入数字时,并不会实时显示 123456…,而是显示 ●●●●●●, 这是为了密码输入安全起见的一贯做法。为 UITextField 设置
secureTextEntry属性为 YES。可以禁用用户在视图中复制文本的功能。 还会用 * 代替输入的字符。 - 但是原生的控件无法实现在一个格子里输入一个字符,而且还要在这个格子中心显示●,所以密码输入的 6 个方框和●都是假象,是用代码画上去的。
- 每次在 UITextField 中输入、删除数字,都要进行判断,根据 UITextField 中文本的个数同步添加或删除●
- 边界情况,当输入的数字个数大于等于 6 个,禁止输入。
- 为了提高用户体验,当输入完第 6 个数字时,自动关闭键盘,发起网络请求以验证密码。
CYPasswordView_Block 源码分析
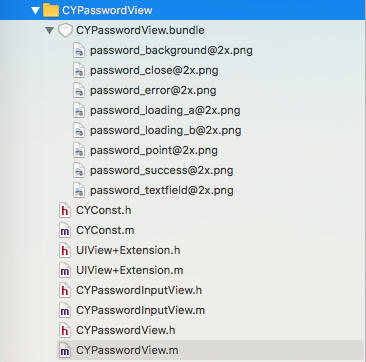
CYPasswordView 代码结构
CYPasswordView.bundle
图片库,包含所有图片素材
CYConst
通用宏定义、密码框各控件的尺寸常量
UIView+Extension
简化设置视图尺寸的范畴方法
CYPasswordInputView
密码框的输入背景视图 (把
password_background@2x.png、password_textfield@2x.png两个背景图片绘制上去),主要包含标题、关闭按钮、忘记密码按钮、以及绘制 6 个●的操作。CYPasswordView
包含蒙版图层、CYPasswordInputView、UITextField 控件、再添加加载图片、加载文字标签、处理判断输入逻辑、加载显示旋转动画等
前三个不多说了,主要看后两个
CYPasswordInputView
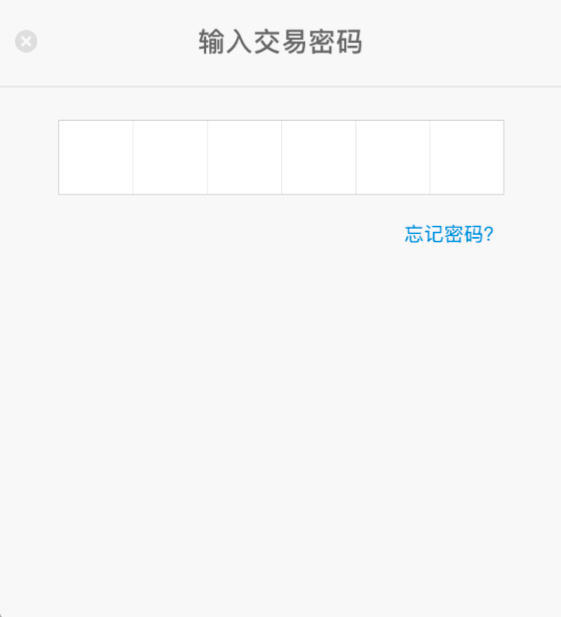
在指定初始化方法 initWithFrame: 中添加 关闭按钮 和 忘记密码按钮 , 然后在 layoutSubviews 方法中对这两个控件重新布局,按钮的 Target-Action 点击事件通过 Blocks 传递。
#pragma mark  - 生命周期方法
- (instancetype)initWithFrame:(CGRect)frame {
    if (self = [super initWithFrame:frame]) {
        self.backgroundColor = [UIColor clearColor];
        /** 添加子控件 */
        [self setupSubViews];
    }
    return self;
}

/** 添加子控件 */
- (void)setupSubViews {
    /** 关闭按钮 */
    UIButton *btnCancel = [UIButton buttonWithType:UIButtonTypeCustom];
    [self addSubview:btnCancel];
    [btnCancel setBackgroundImage:[UIImage imageNamed:CYPasswordViewSrcName(@"password_close")] forState:UIControlStateNormal];
    [btnCancel setTitleColor:[UIColor darkGrayColor] forState:UIControlStateNormal];
    self.btnClose = btnCancel;
    [self.btnClose addTarget:self action:@selector(btnClose_Click:) forControlEvents:UIControlEventTouchUpInside];

    /** 忘记密码按钮 */
    UIButton *btnForgetPWD = [UIButton buttonWithType:UIButtonTypeCustom];
    [self addSubview:btnForgetPWD];
    [btnForgetPWD setTitle:@"忘记密码?" forState:UIControlStateNormal];
    [btnForgetPWD setTitleColor:CYColor(0, 125, 227) forState:UIControlStateNormal];
    btnForgetPWD.titleLabel.font = CYFont(13);
    [btnForgetPWD sizeToFit];
    self.btnForgetPWD = btnForgetPWD;
    [self.btnForgetPWD addTarget:self action:@selector(btnForgetPWD_Click:) forControlEvents:UIControlEventTouchUpInside];
}

- (void)layoutSubviews {
    [super layoutSubviews];
    // 设置关闭按钮的坐标
    self.btnClose.width = CYPasswordViewCloseButtonWH;
    self.btnClose.height = CYPasswordViewCloseButtonWH;
    self.btnClose.x = CYPasswordViewCloseButtonMarginLeft;
    self.btnClose.centerY = CYPasswordViewTitleHeight * 0.5;

    // 设置忘记密码按钮的坐标
    self.btnForgetPWD.x = CYScreenWidth - (CYScreenWidth - CYPasswordViewTextFieldWidth) * 0.5 - self.btnForgetPWD.width;
    self.btnForgetPWD.y = CYPasswordViewTitleHeight + CYPasswordViewTextFieldMarginTop + CYPasswordViewTextFieldHeight + CYPasswordViewForgetPWDButtonMarginTop;
}

// 按钮点击
- (void)btnClose_Click:(UIButton *)sender {
    if (self.cancelBlock) {
        self.cancelBlock();
    }
    [self.inputNumArray removeAllObjects];
}

- (void)btnForgetPWD_Click:(UIButton *)sender {
    if (self.forgetPasswordBlock) {
        self.forgetPasswordBlock();
    }
}
在 drawRect: 方法中把图片画在图层上,标题也并不是 Label 控件,而是画上去的字符串,6 个●也同时被画上去了,它是遍历数组中元素的个数画上去的。
所以说,每次在输入框中删除、添加数字,都会通过调用 [self setNeedsDisplay] 将 drawRect: 方法中的所有视图重新绘制一遍,目的是需要遍历数组,重画●
- (void)drawRect:(CGRect)rect {
    // 画背景视图
    UIImage *imgBackground =
        [UIImage imageNamed:CYPasswordViewSrcName(@"password_background")];
    [imgBackground drawInRect:rect];

    // 画输入框
    CGFloat textfieldY = CYPasswordViewTitleHeight + CYPasswordViewTextFieldMarginTop;
    CGFloat textfieldW = CYPasswordViewTextFieldWidth;
    CGFloat textfieldX = (CYScreenWidth - textfieldW) * 0.5;
    CGFloat textfieldH = CYPasswordViewTextFieldHeight;
    UIImage *imgTextfield =
        [UIImage imageNamed:CYPasswordViewSrcName(@"password_textfield")];
    [imgTextfield drawInRect:CGRectMake(textfieldX, textfieldY, textfieldW, textfieldH)];

    // 画标题
    NSString *title = (self.title ? self.title : @"输入交易密码");
    NSDictionary *arrts = @{NSFontAttributeName:CYFontB(18)};
    CGSize size = [title boundingRectWithSize:CGSizeMake(MAXFLOAT, MAXFLOAT)
                                      options:NSStringDrawingUsesLineFragmentOrigin
                                   attributes:arrts
                                      context:nil].size;
    CGFloat titleW = size.width;
    CGFloat titleH = size.height;
    CGFloat titleX = (self.width - titleW) * 0.5;
    CGFloat titleY = (CYPasswordViewTitleHeight - titleH) * 0.5;
    CGRect titleRect = CGRectMake(titleX, titleY, titleW, titleH);

    NSMutableDictionary *attr = [NSMutableDictionary dictionary];
    attr[NSFontAttributeName] = CYFontB(18);
    attr[NSForegroundColorAttributeName] = CYColor(102, 102, 102);
    [title drawInRect:titleRect withAttributes:attr];


    // 画点
    UIImage *pointImage =
        [UIImage imageNamed:CYPasswordViewSrcName(@"password_point")];
    CGFloat pointW = CYPasswordViewPointnWH;
    CGFloat pointH = CYPasswordViewPointnWH;
    CGFloat pointY = textfieldY + (textfieldH - pointH) * 0.5;
    __block CGFloat pointX;

    // 一个格子的宽度
    CGFloat cellW = textfieldW / kNumCount;
    CGFloat padding = (cellW - pointW) * 0.5;
    // 根据数组中元素的个数画黑点
    [self.inputNumArray enumerateObjectsUsingBlock:^(id obj, NSUInteger idx, BOOL *stop) {
        pointX = textfieldX + (2 * idx + 1) * padding + idx * pointW;
        [pointImage drawInRect:CGRectMake(pointX, pointY, pointW, pointH)];
    }];
}
首先来看在类扩展中声明的可变数组:
/** 保存用户输入的数字集合 */
@property (nonatomic, strong) NSMutableArray *inputNumArray;
响应输入的两个方法
#pragma mark  - 私有方法
// 响应用户按下删除键事件
- (void)deleteNumber {
    [self.inputNumArray removeLastObject]; // 如果是删除键,就移除数组中的最后一个数字
    [self setNeedsDisplay]; // 根据数组的个数重绘整个视图
}

// 响应用户按下数字键事件
- (void)number:(NSDictionary *)userInfo {
    NSString *numObj = userInfo[CYPasswordViewKeyboardNumberKey];
    if (numObj.length >= kNumCount) return; // ⚠️ 这行代码应该是永远不会执行的吧。等会再说为啥
    [self.inputNumArray addObject:numObj]; // 这里每次输入一个数字,就会把该数字存进数组中
    [self setNeedsDisplay]; // 根据数组的个数重绘整个视图
}其实可以不用重绘整个视图,因为只是重置小圆点,可以重绘指定区域视图:setNeedsDisplayInRect:
// 响应用户按下删除键事件
- (void)deleteNumber {
    [self.inputNumArray removeLastObject];
    [self setNeedsDisplayInRect:[self textFieldRect]];
}

// 响应用户按下数字键事件
- (void)number:(NSDictionary *)userInfo {
    NSString *numObj = userInfo[CYPasswordViewKeyboardNumberKey];
    if (numObj.length >= kNumCount) return;
    [self.inputNumArray addObject:numObj];
    [self setNeedsDisplayInRect:[self textFieldRect]];
}

- (CGRect)textFieldRect {
    CGFloat textfieldY = CYPasswordViewTitleHeight + CYPasswordViewTextFieldMarginTop;
    CGFloat textfieldW = CYPasswordViewTextFieldWidth;
    CGFloat textfieldX = (CYScreenWidth - textfieldW) * 0.5;
    CGFloat textfieldH = CYPasswordViewTextFieldHeight;
    return CGRectMake(textfieldX, textfieldY, textfieldW, textfieldH);
}
CYPasswordView
再看 CYPasswordView 这个类,指定初始化方法中添加了几个子视图、蒙版、输入框、响应者 UITextField、加载图片和加载文字、单击手势。布局子视图方法 layoutSubviews 中重新布局了加载图片和加载文字标签的位置。
- (instancetype)initWithFrame:(CGRect)frame {
    self = [super initWithFrame:CYScreen.bounds]; // frame 是固定的
    if (self) {
        [self setupUI];
    }
    return self;
}

- (void)setupUI {
    self.backgroundColor = [UIColor clearColor];
    // 蒙版
    [self addSubview:self.coverView];
    // 输入框
    [self addSubview:self.passwordInputView];
    // 响应者
    [self addSubview:self.txfResponsder];
    [self.passwordInputView addSubview:self.imgRotation];
    [self.passwordInputView addSubview:self.lblMessage];
    // 手势
    [self addGestureRecognizer:[[UITapGestureRecognizer alloc]
                                initWithTarget:self
                                action:@selector(tap:)]];
}

- (void)layoutSubviews {
    [super layoutSubviews];
      // 调整旋转图片布局
    self.imgRotation.centerX = self.passwordInputView.centerX;
    self.imgRotation.centerY = self.passwordInputView.height * 0.5;
    // 调整提示文本布局
    self.lblMessage.x = 0;
    self.lblMessage.y = CGRectGetMaxY(self.imgRotation.frame) + 20;
    self.lblMessage.width = CYScreenWidth;
    self.lblMessage.height = 30;
}
- ① 添加单击手势的作用:点击输入框,弹出键盘
- (void)tap:(UITapGestureRecognizer *)recognizer {
    // 获取点击的坐标位置
    CGPoint p = [recognizer locationInView:self.passwordInputView];
    // 6块矩形输入框区域
    CGRect f = CGRectMake(39, 80, 297, 50);
    // 判断点击区域是否包含在输入框区域中
    if (CGRectContainsPoint(f, p)) {
        [self.txfResponsder becomeFirstResponder];
    } else {
        NSLog(@"==============");
    }
}
因为要响应点击事件,所以蒙版是一个 UIControl
- (UIControl *)coverView {
    if (_coverView == nil) {
        _coverView = [[UIControl alloc] init];
        [_coverView setBackgroundColor:[UIColor blackColor]];
        _coverView.alpha = 0.4;
        _coverView.frame = self.bounds;
    }
    return _coverView;
}- ② 为何要手动通过点击事件弹出键盘,而不是点击 UITextField 自动弹出键盘 ?
// 这里的 UITextField 实例对象就像名字一样,只是作为一个响应者,
// 它的 frame 是 CGRectMake(0, 0, 1, 1)
// 优化点:其实还是可以把它设置得跟图片一样大的,只要把它设置为透明就行了,背景色、text、tintColor、通通设置为透明色,1.可以充分利用控件本身的特性。2.不用手动添加点击事件。
- (UITextField *)txfResponsder {
    if (_txfResponsder == nil) {
        _txfResponsder = [[UITextField alloc] init];
        _txfResponsder.delegate = self;
        _txfResponsder.keyboardType = UIKeyboardTypeNumberPad;
        _txfResponsder.frame = CGRectMake(0, 0, 1, 1);
        _txfResponsder.secureTextEntry = YES;
    }
    return _txfResponsder;
}
这个类中实现取消按钮和忘记密码按钮依旧是通过 Block 的方式传递,只是增加了重置密码框操作
- (CYPasswordInputView *)passwordInputView {
    WS(weakself);
    if (_passwordInputView == nil) {
        _passwordInputView = [[CYPasswordInputView alloc] init];

        _passwordInputView.cancelBlock = ^{
            [weakself cancel];
        };

        _passwordInputView.forgetPasswordBlock = ^{
            [weakself forgetPassword];
        };
    }
    return _passwordInputView;
}

/** 输入框的取消按钮点击 */
- (void)cancel {
    [self resetPasswordView];
    if (self.cancelBlock) {
        self.cancelBlock();
    }
}
/** 输入框的忘记密码按钮点击 */
- (void)forgetPassword {
    [self resetPasswordView];
    if (self.forgetPasswordBlock) {
        self.forgetPasswordBlock();
    }
}

/** 重置密码框 */
- (void)resetPasswordView {
    [self hidenKeyboard:^(BOOL finished) {
        self.passwordInputView.hidden = YES;
        tempStr = nil;
        [self removeFromSuperview];
        [self hidenKeyboard:nil];
        [self.passwordInputView setNeedsDisplay];
    }];
}
处理键盘输入的 UITextFieldDelegate 协议方法:
#pragma mark  - 常量区
// 前面的角落里声明了一个变量用户保存密码字符串
static NSString *tempStr;

//...

#pragma mark  - <UITextFieldDelegate>
#pragma mark  处理字符串 和 删除键

// 每当一个字符被键入时,都会首先调用此方法,询问是否应该将输入的字符添加进 TextField 中。
// 因此调用该方法时,正被输入的字符实际上还没有被添加进 TextField 中
- (BOOL)textField:(UITextField *)textField shouldChangeCharactersInRange:(NSRange)range replacementString:(NSString *)string {
    if (!tempStr) {
        tempStr = string;
    }else{
        // 把正在输入的数字和之前所有输入的数字拼接起来
        // 因此 tempStr 字符串中存放的是所有的数字
        tempStr = [NSString stringWithFormat:@"%@%@",tempStr,string];
    }
    // 判断是否是删除按钮?
    if ([string isEqualToString:@""]) {
        // 响应用户按下删除键事件,删除小黑点
        [self.passwordInputView deleteNumber];
        // 如果是删除按钮,再判断容器字符串的长度?
        if (tempStr.length > 0) {   //  删除最后一个字符串
            NSString *lastStr = [tempStr substringToIndex:[tempStr length] - 1];
            tempStr = lastStr;
        }
    } else{
        // 如果不是删除按钮,先判断容器字符串的长度是否=6?
        if (tempStr.length == 6) {
            if (self.finish) {
                self.finish(tempStr);
                self.finish = nil;
            }
            tempStr = nil;
        }
        // 更新 CYPasswordInputView 中的黑点
        // ❇️把当前输入的数字通过字典的方式传递,key为常量,value 是当前输入的数字
        NSMutableDictionary *userInfoDict = [NSMutableDictionary dictionary];
        userInfoDict[CYPasswordViewKeyboardNumberKey] = string;
        [self.passwordInputView number:userInfoDict];
    }
    return YES;
}
❇️因为当前输入的数字是通过键值对的方式发送给 passwordInputView 对象的,所以它响应用户按下数字的方法中:
// 响应用户按下数字键事件
- (void)number:(NSDictionary *)userInfo {
    NSString *numObj = userInfo[CYPasswordViewKeyboardNumberKey];
    if (numObj.length >= kNumCount) return; // ⚠️
    [self.inputNumArray addObject:numObj]; // 这里每次输入一个数字,就会把该数字存进数组中
    [self setNeedsDisplay]; // 根据数组的个数重绘整个视图
}
方法中的 numObj 就是当前输入的数字,numObj.length 永远等于 1,所以我说这行代码是永远不会执行的。
弹出密码框的方法:
// 弹出密码框
[self.passwordView showInView:self.view.window];
源码:
- (void)showInView:(UIView *)view {
    [view addSubview:self];
    /** 输入框起始frame */
    self.passwordInputView.height = CYPasswordInputViewHeight;
    self.passwordInputView.y = self.height;
    self.passwordInputView.width = CYScreenWidth;
    self.passwordInputView.x = 0;
    /** 弹出键盘 */
    [self showKeyboard];
}

/** 键盘弹出 */
- (void)showKeyboard {
    [self.txfResponsder becomeFirstResponder];
    [UIView animateWithDuration:CYPasswordViewAnimationDuration
                          delay:0
                        options:UIViewAnimationOptionTransitionNone
                     animations:^{
         self.passwordInputView.y = (self.height - self.passwordInputView.height);
                     }
                     completion:^(BOOL finished) {
         NSLog(@" ========= %@", NSStringFromCGRect(self.passwordInputView.frame));
                     }];
}
这段代码添加了一个动画让 passwordInputView 的 Y 点从:
self.height → (self.height - self.passwordInputView.height)
就是从底部向上推出的动画,它是先弹出键盘,再弹出 passwordInputView。
最后,旋转动画都是对加载图片和加载文字作了一些更改:
/**
 *  开始旋转
 */
- (void)startRotation:(UIView *)view {
    _imgRotation.hidden = NO;
    _imgRotation.image =
      [UIImage imageNamed:CYPasswordViewSrcName(@"password_loading_b")];
    _lblMessage.hidden = NO;
    self.lblMessage.text = _loadingText;

    CABasicAnimation* rotationAnimation;
    rotationAnimation = [CABasicAnimation animationWithKeyPath:@"transform.rotation.z"];
    rotationAnimation.toValue = [NSNumber numberWithFloat: M_PI * 2.0 ];
    rotationAnimation.duration = 2.0;
    rotationAnimation.cumulative = YES;
    rotationAnimation.repeatCount = MAXFLOAT;
    [view.layer addAnimation:rotationAnimation forKey:@"rotationAnimation"];
}

/**
 *  结束旋转
 */
- (void)stopRotation:(UIView *)view {
    [view.layer removeAllAnimations];
}

- (void)startLoading {
    [self startRotation:self.imgRotation];
    [self.passwordInputView disEnalbeCloseButton:NO];
}

- (void)stopLoading {
    [self stopRotation:self.imgRotation];
    [self.passwordInputView disEnalbeCloseButton:YES];
}

- (void)requestComplete:(BOOL)state {
    if (state) {
        [self requestComplete:state message:@"支付成功"];
    } else {
        [self requestComplete:state message:@"支付失败"];
    }
}
- (void)requestComplete:(BOOL)state message:(NSString *)message {
    if (state) {
        // 请求成功
        self.lblMessage.text = message;
        self.imgRotation.image =
          [UIImage imageNamed:CYPasswordViewSrcName(@"password_success")];
    } else {
        // 请求失败
        self.lblMessage.text = message;
        self.imgRotation.image =
          [UIImage imageNamed:CYPasswordViewSrcName(@"password_error")];
    }
}
分析完以上源码后,我又对该项目重构并进行了些许修改:
- 密码输入框:HQLPasswordViewDemo