- GitHub 地址:ealeksandrov/EAIntroView
- star: 3400+
EAIntroView - 简单的 iOS 引导视图
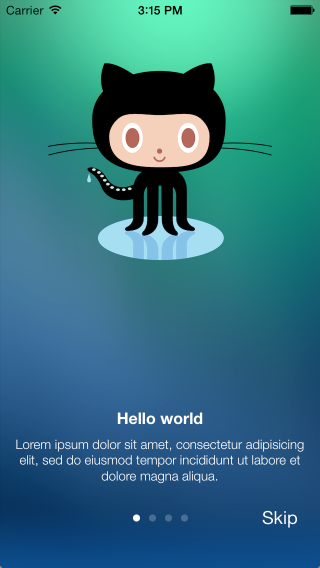

启动引导页视图的高度可定制的嵌入式解决方案。
一些功能特征(记住,大多数功能是可选的并且可以被关闭)
- 能够查看一些优秀的 demo 示例项目(WTF!🙄 这也算特征?)
- 无限自定义,可以使用动画和交互式页面创建复杂的 interView,因此不要限制于现有的示例。(The only limit is your imagination !)
- 对于每一个基础页面 :EAIntroPage:
- 背景 (在页面之间进行交叉溶解切换)
- 在背景上自定义 iOS7 运动效果(视差)
- 标题视图 title view (+ Y position)—— 可以显示在所有页面上的视图,默认 YES 显示。
- 标题图片 titleIconView—— 单独为每一个页面标题设置的视图,支持 UIImageView 或 animated views。
- 标题文本 title text (+ font, color and Y position)
- 描述文本 description text (+ font, color, width and Y position)
- 子视图数组 subviews array (added to page after building default layout)
- 可以设置自定义页面视图:
+ (instancetype)page+ (instancetype)pageWithCustomView:+ (instancetype)pageWithCustomViewFromNibNamed:+ (instancetype)pageWithCustomViewFromNibNamed:bundle:
- 可以在页面事件中设置 block action 事件:
- onPageDidLoad
- onPageDidAppear
- onPageDidDisappear
- 自定义父视图的许多选项:
- 从最后一页滑动到关闭
- 使用简单的 tap 切换页面
- 自定义背景图片或者颜色
- 自定义 page control
- 自定义 skip button
- 固定 titleView (+ Y position, can be hidden on some pages)
- 可监听的委托协议
EAIntroDelegate:- (void)introWillFinish: wasSkipped:- (void)introDidFinish: wasSkipped:- (void)intro:pageAppeared:withIndex:- (void)intro:pageStartScrolling:withIndex:- (void)intro:pageEndScrolling:withIndex:(void)intro:didScrollWithOffset:
- IntroView 动作:
- setPages:
- showInView:animateDuration:
- hideWithFadeOutDuration:
- setCurrentPageIndex:animated:
- 支持 storyboard/IB
- and many more…
CocoaPods
CocoaPods is the recommended way to use EAIntroView in your project.
- Simply add this line to your
Podfile:pod 'EAIntroView', '~> 2.10.0' - Run
pod install. - Include with
#import "EAIntroView.h"to use it wherever you need. - Subscribe to the
EAIntroDelegateto enable delegate/callback interaction.
Manual installation
- Add
EAIntroPageandEAIntroViewheaders and implementations to your project (4 files total). - Add EARestrictedScrollView header and implementation to your project (2 files total).
- Include with
#import "EAIntroView.h"to use it wherever you need. - Subscribe to the
EAIntroDelegateto enable delegate/callback interaction.
如何使用
Sample project have many examples of customization. Here are only simple ones.
📌
这个框架只有两个类:
- EAIntroPage :用于设置每个不同的页面。
- EAIntroView :包含所有页面的容器视图。
Step 1 - 构建页面
使用 [EAIntroPage page] 类方法创建页面。 然后,你可以自定义任何属性,所有属性都是可选的。 另一种方法是通过你自己的(可以是 nib 文件),在 EAIntroPage 中定制视图,该方法会忽略大多数其他选项。
// basic
EAIntroPage *page1 = [EAIntroPage page];
page1.title = @"Hello world";
page1.desc = sampleDescription1;

// custom
EAIntroPage *page2 = [EAIntroPage page];
page2.title = @"This is page 2";
page2.titleFont = [UIFont fontWithName:@"Georgia-BoldItalic" size:20];
page2.titlePositionY = 220;
page2.desc = sampleDescription2;
page2.descFont = [UIFont fontWithName:@"Georgia-Italic" size:18];
page2.descPositionY = 200;
page2.titleIconView = [[UIImageView alloc] initWithImage:[UIImage imageNamed:@"title2"]];
page2.titleIconPositionY = 100;

// custom view from nib
EAIntroPage *page3 = [EAIntroPage pageWithCustomViewFromNibNamed:@"IntroPage"];
page3.bgImage = [UIImage imageNamed:@"bg2"];
Step 2 - 创建引导视图
Once all pages have been created, you are ready to create the introduction view. Just pass them in right order in the introduction view. You can also pass array of pages after IntroView’s initialization, it will rebuild its contents.
当所有页面创建完成后,你就可以创建引导视图了。 只需在引导视图中按正确的顺序传递它们。 当 EAIntroView 初始化之后,你还可以传递页面数组,它将重建其内容。
EAIntroView *intro = [[EAIntroView alloc] initWithFrame:self.view.bounds andPages:@[page1,page2,page3,page4]];如果你需要使用任何回调,不要忘记设置委托。
[intro setDelegate:self];Step 3 - 显示引导视图
// showFullscreen
[intro showFullscreenWithAnimateDuration:0.3f];

// showInView
[intro showInView:self.view animateDuration:0.0];
📌
关于显示引导视图 showInView:(UIView *)view
源码中有方法可以全屏显示在 UIWindow 上,具体没测过。
如果
rootViewController是 UINavigationController:<!–hexoPostRenderEscape:
// using self.navigationController.view - to display EAIntroView above navigation bar
rootView = self.navigationController.view;
// …:hexoPostRenderEscape–>
[intro showInView:rootView animateDuration:0.0];
如果
rootViewController是 UITabBarController, 就显示在该视图控制器的view上:[introView showInView:self.view];
Storyboard/IB
Since 1.3.0 EAIntroView supports init from IB. Since 2.0.0 EAIntroPage supports it too.
- Drop
UIViewto your IB document. - Set its class to
EAIntroView. - Create
IBOutletproperty in your view controller:@property(nonatomic,weak) IBOutlet EAIntroView *introView;. - Connect
IBOutletwithEAIntroViewin IB. - Build array of pages (you can use
pageWithCustomViewFromNibNamed:here with separate nibs for each page). - Pass pages array to
EAIntroViewproperty insetPages:.
Author
Created and maintained by Evgeny Aleksandrov (@EAleksandrov).
License
EAIntroView is available under the MIT license. See the LICENSE.md file for more info.
Demo
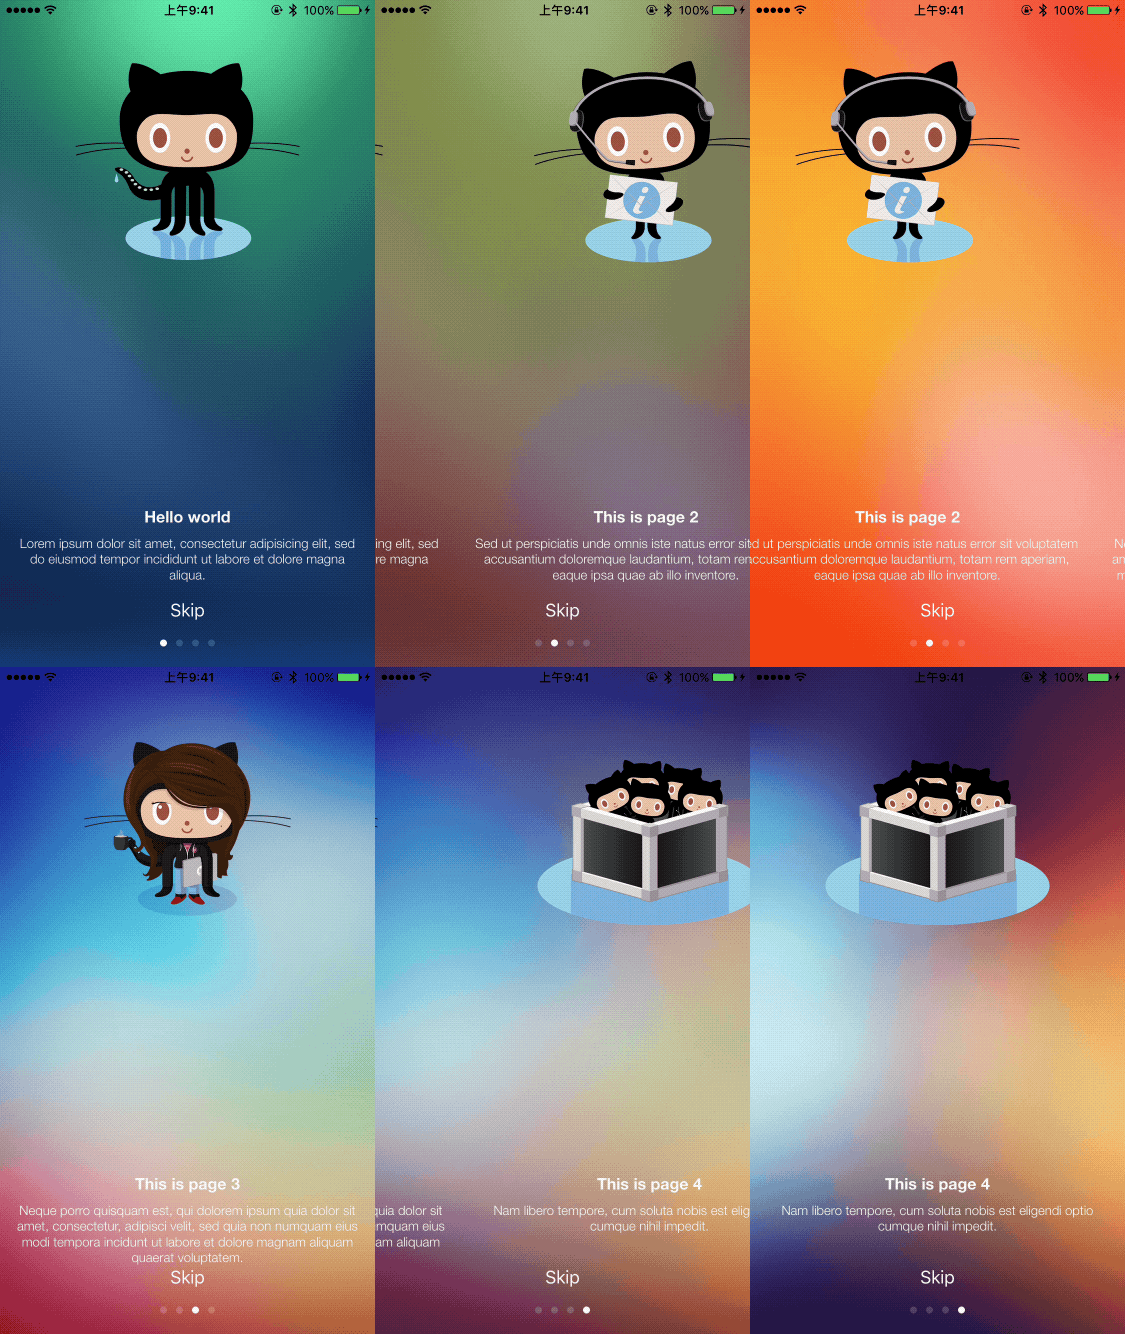
示例一:交叉溶解
all settings are basic, pages with custom backgrounds, title image on each page
- (void)showIntroWithCrossDissolve {
    EAIntroPage *page1 = [EAIntroPage page];
    page1.title = @"Hello world";
    page1.desc = sampleDescription1;
    page1.bgImage = [UIImage imageNamed:@"bg1"];
    page1.titleIconView = [[UIImageView alloc] initWithImage:[UIImage imageNamed:@"title1"]];

    EAIntroPage *page2 = [EAIntroPage page];
    page2.title = @"This is page 2";
    page2.desc = sampleDescription2;
    page2.bgImage = [UIImage imageNamed:@"bg2"];
    page2.titleIconView = [[UIImageView alloc] initWithImage:[UIImage imageNamed:@"title2"]];

    EAIntroPage *page3 = [EAIntroPage page];
    page3.title = @"This is page 3";
    page3.desc = sampleDescription3;
    page3.bgImage = [UIImage imageNamed:@"bg3"];
    page3.titleIconView = [[UIImageView alloc] initWithImage:[UIImage imageNamed:@"title3"]];

    EAIntroPage *page4 = [EAIntroPage page];
    page4.title = @"This is page 4";
    page4.desc = sampleDescription4;
    page4.bgImage = [UIImage imageNamed:@"bg4"];
    page4.titleIconView = [[UIImageView alloc] initWithImage:[UIImage imageNamed:@"title4"]];

    EAIntroView *intro = [[EAIntroView alloc] initWithFrame:rootView.bounds andPages:@[page1,page2,page3,page4]];
    intro.skipButtonAlignment = EAViewAlignmentCenter;
    intro.skipButtonY = 80.f;
    intro.pageControlY = 42.f;

    [intro setDelegate:self];

    [intro showInView:rootView animateDuration:0.3];
}

#pragma mark - EAIntroView delegate

- (void)introDidFinish:(EAIntroView *)introView wasSkipped:(BOOL)wasSkipped {
    if(wasSkipped) {
        NSLog(@"Intro skipped");
    } else {
        NSLog(@"Intro finished");
    }
}
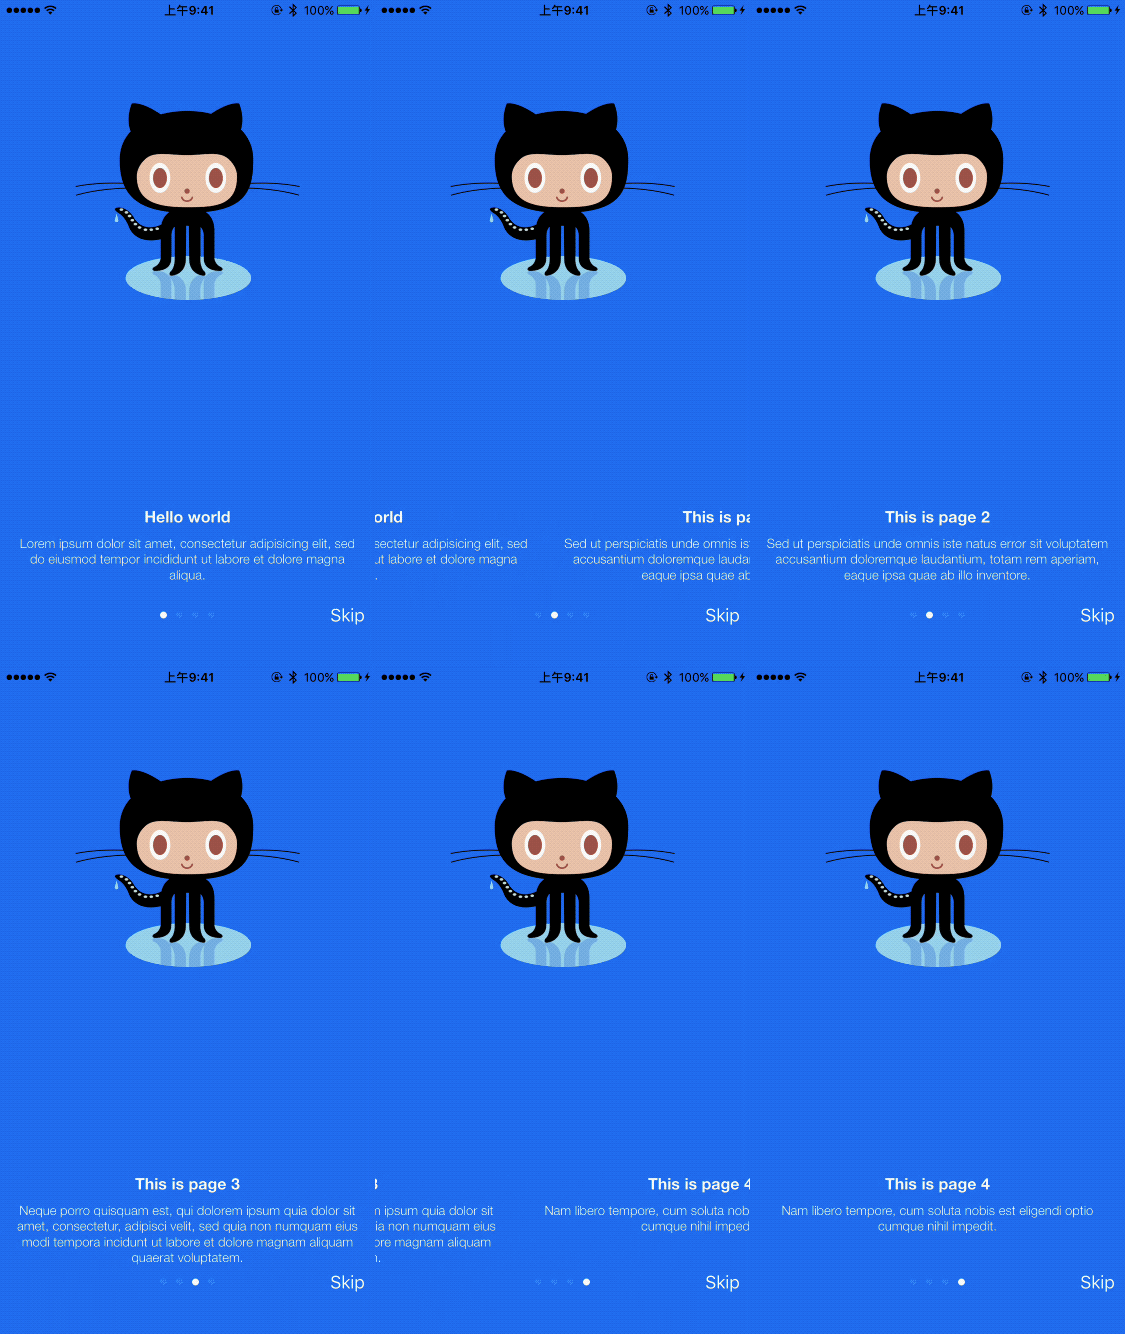
示例二:固定标题视图
all settings are basic, introview with colored background, fixed title image
- (void)showIntroWithFixedTitleView {
    EAIntroPage *page1 = [EAIntroPage page];
    page1.title = @"Hello world";
    page1.desc = sampleDescription1;

    EAIntroPage *page2 = [EAIntroPage page];
    page2.title = @"This is page 2";
    page2.desc = sampleDescription2;

    EAIntroPage *page3 = [EAIntroPage page];
    page3.title = @"This is page 3";
    page3.desc = sampleDescription3;

    EAIntroPage *page4 = [EAIntroPage page];
    page4.title = @"This is page 4";
    page4.desc = sampleDescription4;

    EAIntroView *intro = [[EAIntroView alloc] initWithFrame:rootView.bounds andPages:@[page1,page2,page3,page4]];
    [intro setDelegate:self];

    // 设置固定标题视图,即无论页面滑动到第几页,标题视图永远固定显示
    UIImageView *titleView = [[UIImageView alloc] initWithImage:[UIImage imageNamed:@"title1"]];
    intro.titleView = titleView;
    intro.titleViewY = 90;
    intro.backgroundColor = [UIColor colorWithRed:0.f green:0.49f blue:0.96f alpha:1.f]; //iOS7 dark blue

    [intro showInView:rootView animateDuration:0.3];
}
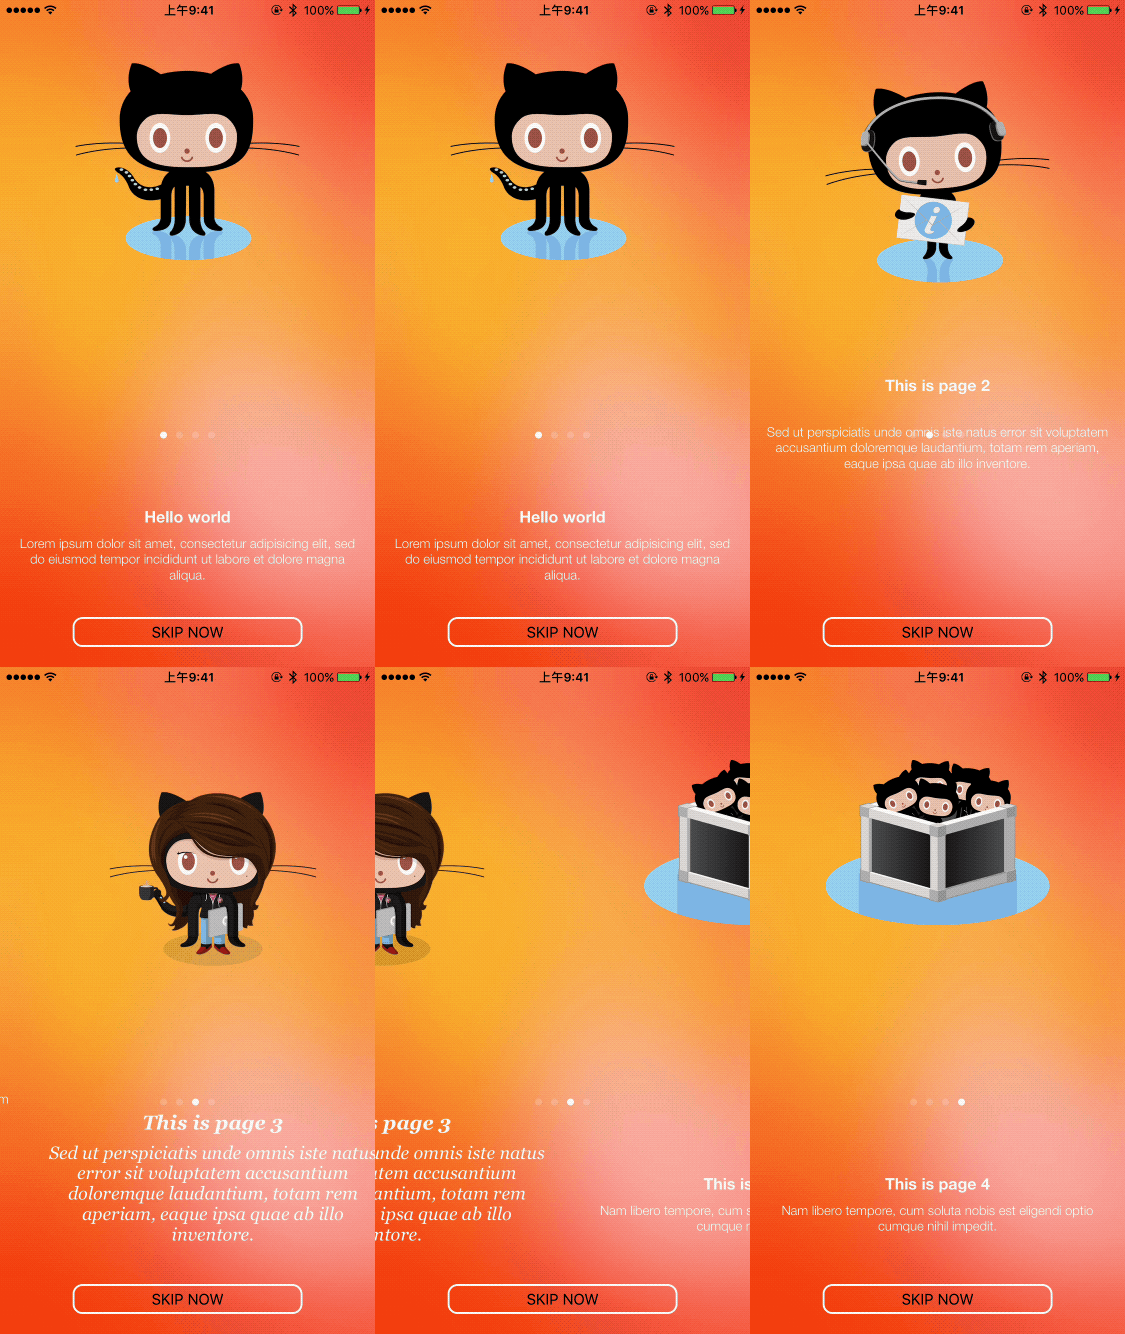
示例三:自定义页面视图
basic pages with custom settings
// 对每个页面内容元素的位置、字体、大小等属性进行设置
- (void)showIntroWithCustomPages {
    EAIntroPage *page1 = [EAIntroPage page];
    page1.title = @"Hello world";
    page1.desc = sampleDescription1;
    page1.titleIconView = [[UIImageView alloc] initWithImage:[UIImage imageNamed:@"title1"]];

    EAIntroPage *page2 = [EAIntroPage page];
    page2.title = @"This is page 2";
    page2.titlePositionY = self.view.bounds.size.height/2 - 10;
    page2.desc = sampleDescription2;
    page2.descPositionY = self.view.bounds.size.height/2 - 50;
    page2.titleIconView = [[UIImageView alloc] initWithImage:[UIImage imageNamed:@"title2"]];
    page2.titleIconPositionY = 70;

    EAIntroPage *page3 = [EAIntroPage page];
    page3.title = @"This is page 3";
    page3.titleFont = [UIFont fontWithName:@"Georgia-BoldItalic" size:20];
    page3.titlePositionY = 220;
    page3.desc = sampleDescription2;
    page3.descFont = [UIFont fontWithName:@"Georgia-Italic" size:18];
    page3.descPositionY = 200;
    page3.titleIconView = [[UIImageView alloc] initWithImage:[UIImage imageNamed:@"title3"]];
    page3.titleIconPositionY = 100;

    EAIntroPage *page4 = [EAIntroPage page];
    page4.title = @"This is page 4";
    page4.desc = sampleDescription4;
    page4.titleIconView = [[UIImageView alloc] initWithImage:[UIImage imageNamed:@"title4"]];

    EAIntroView *intro = [[EAIntroView alloc] initWithFrame:rootView.bounds andPages:@[page1,page2,page3,page4]];
    intro.bgImage = [UIImage imageNamed:@"bg2"];

    intro.pageControlY = 250.f;

    // 自定义 skipButton
    UIButton *btn = [UIButton buttonWithType:UIButtonTypeRoundedRect];
    [btn setFrame:CGRectMake(0, 0, 230, 40)];
    [btn setTitle:@"SKIP NOW" forState:UIControlStateNormal];
    [btn setTitleColor:[UIColor blackColor] forState:UIControlStateNormal];
    btn.layer.borderWidth = 2.f;
    btn.layer.cornerRadius = 10;
    btn.layer.borderColor = [[UIColor whiteColor] CGColor];
    intro.skipButton = btn;
    intro.skipButtonY = 60.f;
    intro.skipButtonAlignment = EAViewAlignmentCenter;

    [intro setDelegate:self];
    [intro showInView:rootView animateDuration:0.3];
}
示例四:自定义视图
using page with custom view
- (void)showIntroWithCustomView {
    EAIntroPage *page1 = [EAIntroPage page];
    page1.title = @"Hello world";
    page1.desc = sampleDescription1;
    page1.bgImage = [UIImage imageNamed:@"bg1"];
    page1.titleIconView = [[UIImageView alloc] initWithImage:[UIImage imageNamed:@"title1"]];

    // 第二页是自定义视图
    UIView *viewForPage2 = [[UIView alloc] initWithFrame:rootView.bounds];
    UILabel *labelForPage2 = [[UILabel alloc] initWithFrame:CGRectMake(0, 300, rootView.bounds.size.width, 30)];
    labelForPage2.text = @"Some custom view";
    labelForPage2.font = [UIFont systemFontOfSize:32];
    labelForPage2.textColor = [UIColor whiteColor];
    labelForPage2.backgroundColor = [UIColor clearColor];
    labelForPage2.transform = CGAffineTransformMakeRotation(M_PI_2*3);
    [viewForPage2 addSubview:labelForPage2];
    EAIntroPage *page2 = [EAIntroPage pageWithCustomView:viewForPage2];
    page2.bgImage = [UIImage imageNamed:@"bg2"];

    EAIntroPage *page3 = [EAIntroPage page];
    page3.title = @"This is page 3";
    page3.desc = sampleDescription3;
    page3.bgImage = [UIImage imageNamed:@"bg3"];
    page3.titleIconView = [[UIImageView alloc] initWithImage:[UIImage imageNamed:@"title3"]];

    EAIntroPage *page4 = [EAIntroPage page];
    page4.title = @"This is page 4";
    page4.desc = sampleDescription4;
    page4.bgImage = [UIImage imageNamed:@"bg4"];
    page4.titleIconView = [[UIImageView alloc] initWithImage:[UIImage imageNamed:@"title4"]];

    EAIntroView *intro = [[EAIntroView alloc] initWithFrame:rootView.bounds andPages:@[page1,page2,page3,page4]];
    [intro.skipButton setTitle:@"Skip now" forState:UIControlStateNormal];
    [intro setDelegate:self];
    intro.tapToNext = YES; // 点击翻页

    [intro showInView:rootView animateDuration:0.3];
}
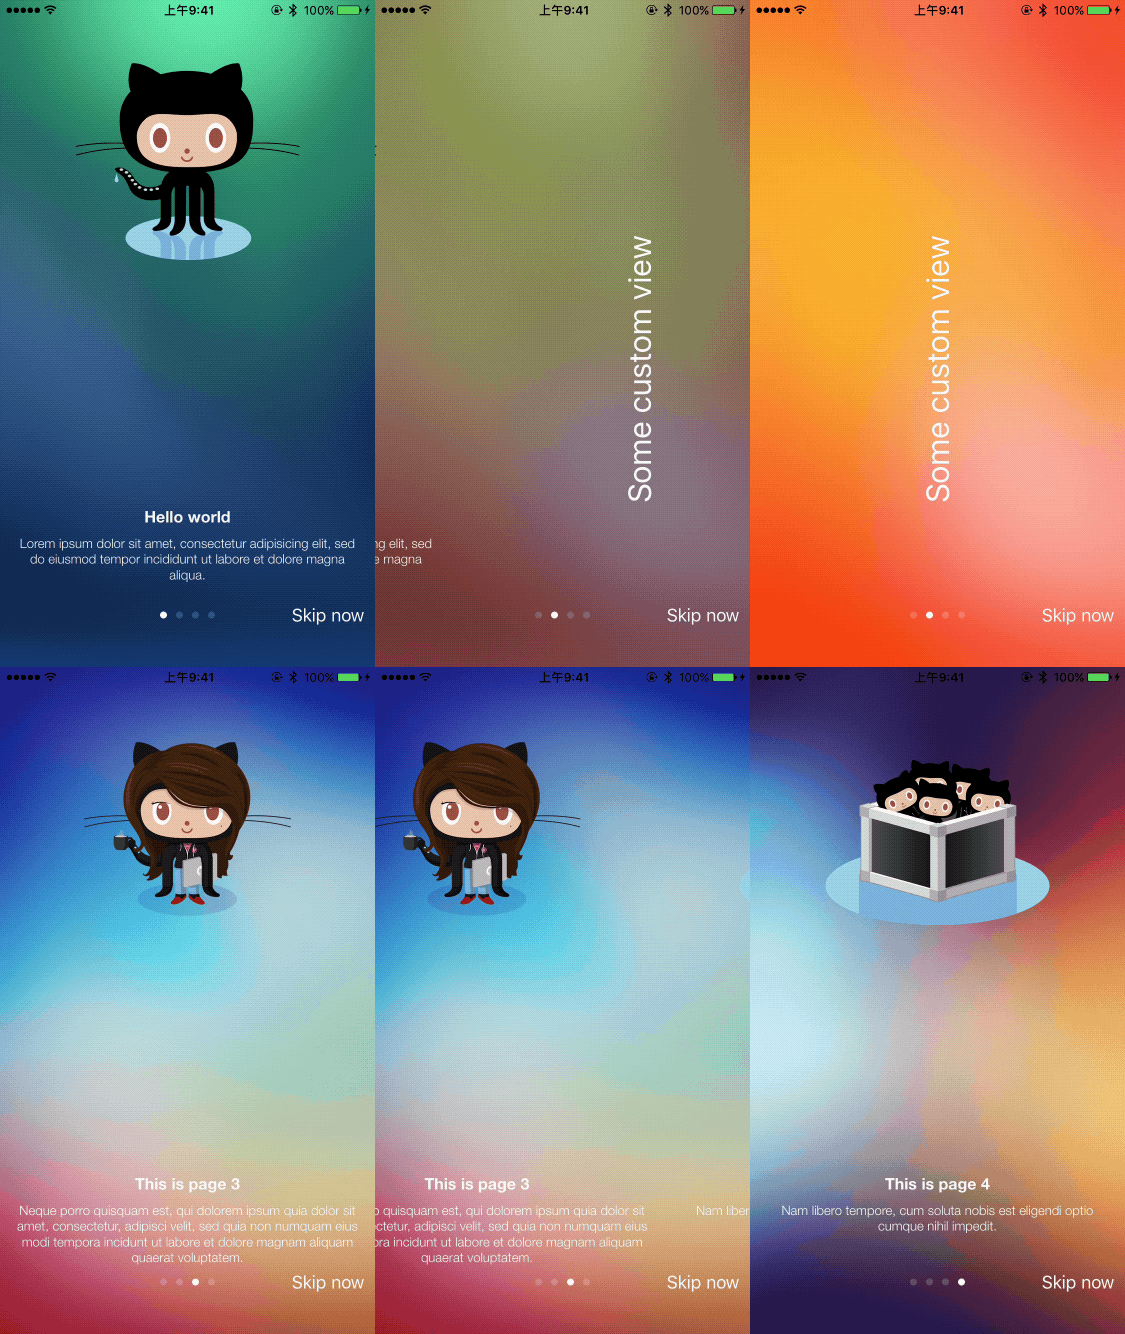
示例五:从 NIB 文件加载自定义视图
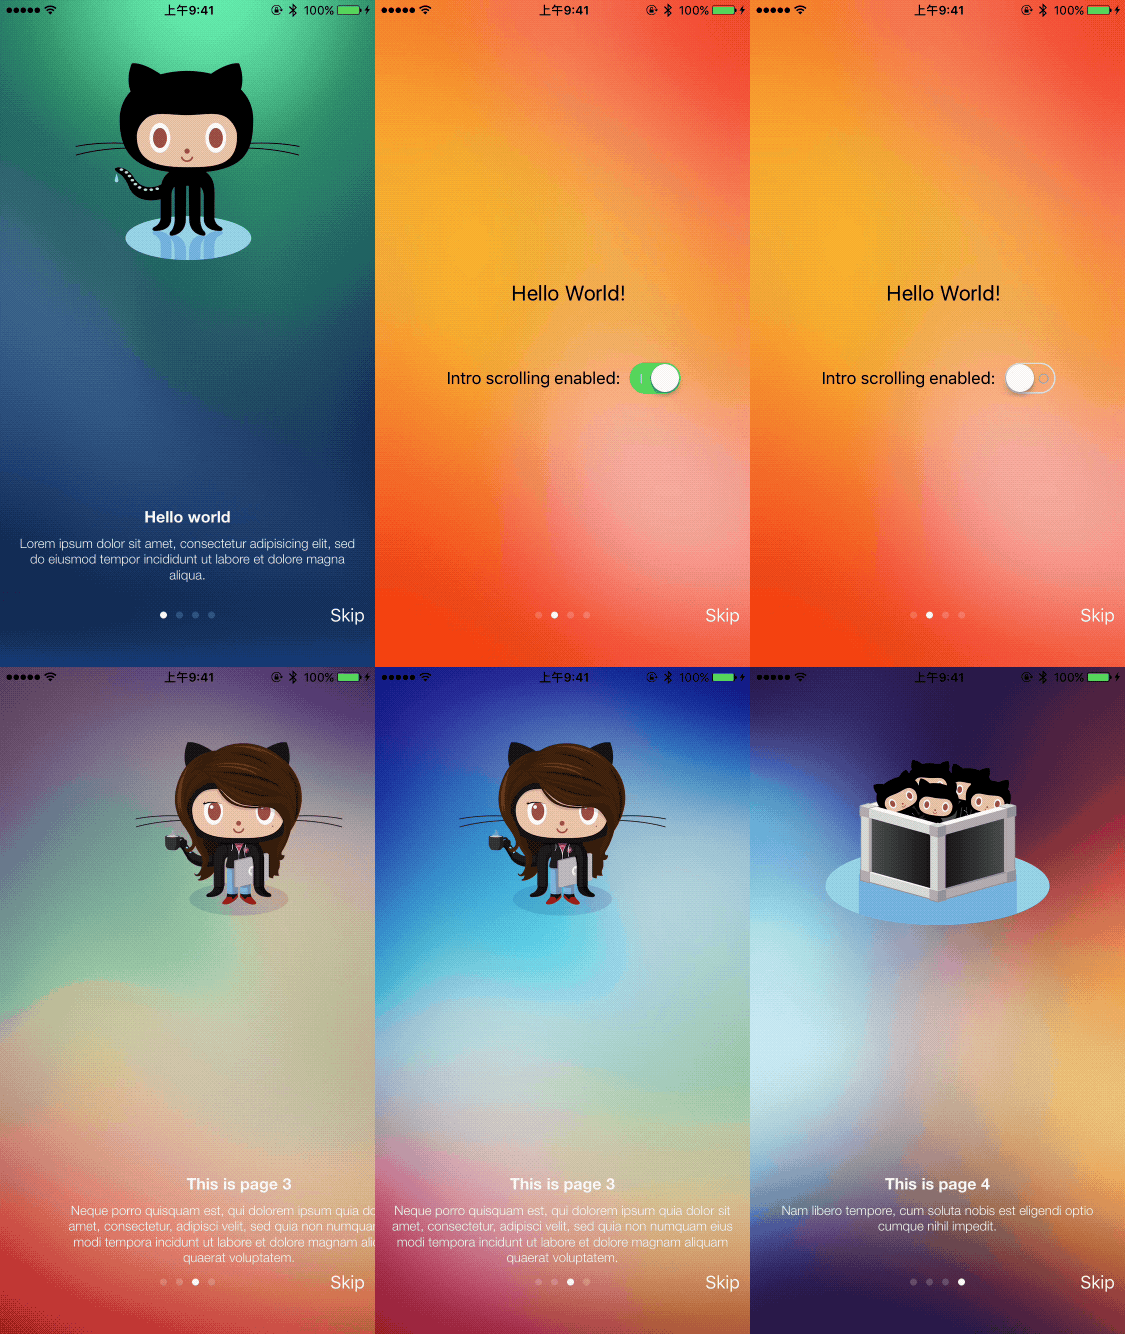
using page with custom view from nib
- (void)showIntroWithCustomViewFromNib {
    EAIntroPage *page1 = [EAIntroPage page];
    page1.title = @"Hello world";
    page1.desc = sampleDescription1;
    page1.bgImage = [UIImage imageNamed:@"bg1"];
    page1.titleIconView = [[UIImageView alloc] initWithImage:[UIImage imageNamed:@"title1"]];

    // 第二页视图是 NIB 文件
    EAIntroPage *page2 = [EAIntroPage pageWithCustomViewFromNibNamed:@"IntroPage"];
    page2.bgImage = [UIImage imageNamed:@"bg2"];

    EAIntroPage *page3 = [EAIntroPage page];
    page3.title = @"This is page 3";
    page3.desc = sampleDescription3;
    page3.bgImage = [UIImage imageNamed:@"bg3"];
    page3.titleIconView = [[UIImageView alloc] initWithImage:[UIImage imageNamed:@"title3"]];

    EAIntroPage *page4 = [EAIntroPage page];
    page4.title = @"This is page 4";
    page4.desc = sampleDescription4;
    page4.bgImage = [UIImage imageNamed:@"bg4"];
    page4.titleIconView = [[UIImageView alloc] initWithImage:[UIImage imageNamed:@"title4"]];

    EAIntroView *intro = [[EAIntroView alloc] initWithFrame:rootView.bounds andPages:@[page1,page2,page3,page4]];
    [intro setDelegate:self];

    UISwitch *switchControl = (UISwitch *)[page2.pageView viewWithTag:1];
    if(switchControl) {
        [switchControl addTarget:self action:@selector(switchFlip:) forControlEvents:UIControlEventValueChanged];
    }

    [intro showInView:rootView animateDuration:0.3];
    _intro = intro;
}

- (IBAction)switchFlip:(id)sender {
    UISwitch *switchControl = (UISwitch *) sender;
    NSLog(@"%@", switchControl.on ? @"On" : @"Off");

    // limit scrolling on one, currently visible page (can't go previous or next page)
    //[_intro setScrollingEnabled:switchControl.on];

    if(!switchControl.on) {
        // scroll no further selected page (can go previous pages, but not next)
        _intro.limitPageIndex = _intro.visiblePageIndex;
    } else {
        [_intro setScrollingEnabled:YES];
    }
}
示例六:单独的页面 Init 和页面回调
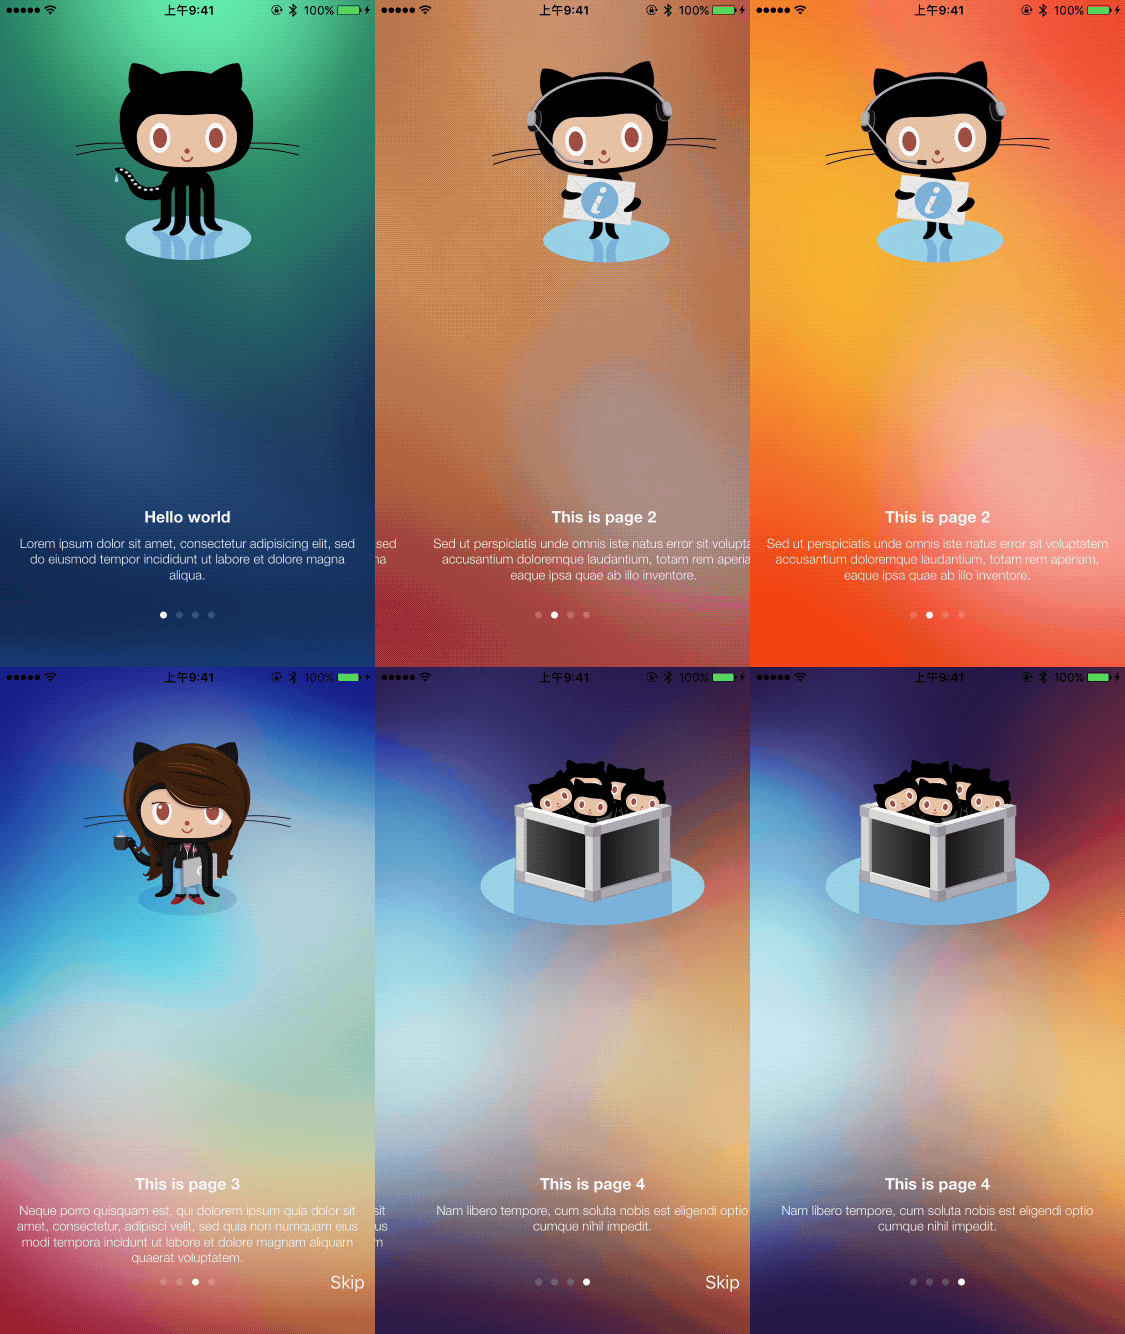
pages separate init and using block callback in one of pages
- (void)showIntroWithSeparatePagesInitAndPageCallback {
    EAIntroPage *page1 = [EAIntroPage page];
    page1.title = @"Hello world";
    page1.desc = sampleDescription1;
    page1.bgImage = [UIImage imageNamed:@"bg1"];
    page1.titleIconView = [[UIImageView alloc] initWithImage:[UIImage imageNamed:@"title1"]];

    EAIntroPage *page2 = [EAIntroPage page];
    page2.title = @"This is page 2";
    page2.desc = sampleDescription2;
    page2.bgImage = [UIImage imageNamed:@"bg2"];
    page2.titleIconView = [[UIImageView alloc] initWithImage:[UIImage imageNamed:@"title2"]];
    // 第二页显示后的 Block
    page2.onPageDidAppear = ^{
        NSLog(@"Page 2 did appear block");
    };

    EAIntroPage *page3 = [EAIntroPage page];
    page3.title = @"This is page 3";
    page3.desc = sampleDescription3;
    page3.bgImage = [UIImage imageNamed:@"bg3"];
    page3.titleIconView = [[UIImageView alloc] initWithImage:[UIImage imageNamed:@"title3"]];

    EAIntroPage *page4 = [EAIntroPage page];
    page4.title = @"This is page 4";
    page4.desc = sampleDescription4;
    page4.bgImage = [UIImage imageNamed:@"bg4"];
    page4.titleIconView = [[UIImageView alloc] initWithImage:[UIImage imageNamed:@"title4"]];

    EAIntroView *intro = [[EAIntroView alloc] initWithFrame:rootView.bounds];
    [intro setDelegate:self];

    // 只在第三页显示 skipButton
    intro.skipButton.alpha = 0.f;
    intro.skipButton.enabled = NO;
    page3.onPageDidAppear = ^{
        intro.skipButton.enabled = YES;
        [UIView animateWithDuration:0.3f animations:^{
            intro.skipButton.alpha = 1.f;
        }];
    };
    page3.onPageDidDisappear = ^{
        intro.skipButton.enabled = NO;
        [UIView animateWithDuration:0.3f animations:^{
            intro.skipButton.alpha = 0.f;
        }];
    };

    [intro setPages:@[page1,page2,page3,page4]];

    [intro showInView:rootView animateDuration:0.3];
}
示例七:自定义引导视图
show custom intro
- (void)showCustomIntro {
    EAIntroPage *page1 = [EAIntroPage page];
    page1.title = @"Hello world";
    page1.titlePositionY = 240;
    page1.desc = sampleDescription1;
    page1.descPositionY = 220;
    page1.bgImage = [UIImage imageNamed:@"bg1"];
    page1.titleIconView = [[UIImageView alloc] initWithImage:[UIImage imageNamed:@"title1"]];
    page1.titleIconPositionY = 100;
    page1.showTitleView = NO; // 第一页不显示 titleView

    EAIntroPage *page2 = [EAIntroPage page];
    page2.title = @"This is page 2";
    page2.titlePositionY = 240;
    page2.desc = sampleDescription2;
    page2.descPositionY = 220;
    page2.bgImage = [UIImage imageNamed:@"bg2"];
    page2.titleIconView = [[UIImageView alloc] initWithImage:[UIImage imageNamed:@"icon1"]];
    page2.titleIconPositionY = 260;

    EAIntroPage *page3 = [EAIntroPage page];
    page3.title = @"This is page 3";
    page3.titlePositionY = 240;
    page3.desc = sampleDescription3;
    page3.descPositionY = 220;
    page3.bgImage = [UIImage imageNamed:@"bg3"];
    page3.titleIconView = [[UIImageView alloc] initWithImage:[UIImage imageNamed:@"icon2"]];
    page3.titleIconPositionY = 260;

    EAIntroPage *page4 = [EAIntroPage page];
    page4.title = @"This is page 4";
    page4.titlePositionY = 240;
    page4.desc = sampleDescription4;
    page4.descPositionY = 220;
    page4.bgImage = [UIImage imageNamed:@"bg4"];
    page4.titleIconView = [[UIImageView alloc] initWithImage:[UIImage imageNamed:@"icon3"]];
    page4.titleIconPositionY = 260;

    EAIntroView *intro = [[EAIntroView alloc] initWithFrame:rootView.bounds andPages:@[page1,page2,page3,page4]];
    intro.titleView = [[UIImageView alloc] initWithImage:[UIImage imageNamed:@"bigLogo"]];
    intro.titleViewY = 120;
    intro.tapToNext = YES;
    [intro setDelegate:self];

    /**
     * SMPageControl 是另一个第三方框架.
     *
     * 它可以使用一系列其他自定义选项替代 UIPageControl。
     * GitHub地址:https://github.com/Spaceman-Labs/SMPageControl
     */
    SMPageControl *pageControl = [[SMPageControl alloc] init];
    pageControl.pageIndicatorImage = [UIImage imageNamed:@"pageDot"];
    pageControl.currentPageIndicatorImage = [UIImage imageNamed:@"selectedPageDot"];
    [pageControl sizeToFit];

    // This is a hack - not recommended for Swift, more information: https://github.com/ealeksandrov/EAIntroView/issues/161
    intro.pageControl = (UIPageControl *)pageControl;
    intro.pageControlY = 130.f;

    // 自定义 Button
    UIButton *btn = [UIButton buttonWithType:UIButtonTypeCustom];
    [btn setBackgroundImage:[UIImage imageNamed:@"skipButton"] forState:UIControlStateNormal];
    [btn setFrame:CGRectMake(0, 0, 270, 50)];
    intro.skipButton = btn;
    intro.skipButtonY = 80.f;
    intro.skipButtonAlignment = EAViewAlignmentCenter;

    [intro showInView:rootView animateDuration:0.3];
}
