Asset Catalogs (资产分类),它可以管理物理图像文件和这些文件的上下文信息。
参考:
- GitHub 源码:shinobicontrols/iOS7-day-by-day
- 天天品尝 iOS7 甜点 :: Day 1 :: NSURLSession
- 知乎专栏:iOS 温习之路 ” Bundle “
Asset Catalog - 资产分类
- 资产分类目录由一些图像的集合、app 图标和 app 启动页构成。
- 新建工程时,Xcode 会自动创建一个名为
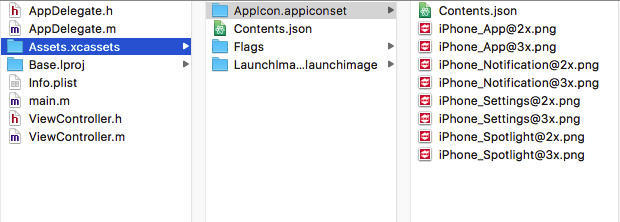
Assets.xcassets的文件夹。 - Asset catalogs 是存在在硬盘上面的一个目录,由 Xcode 进行管理。它以特定的方式进行文件的排列,包含一个 json 文件存储目录相关联的元数据:
App icons and launch images
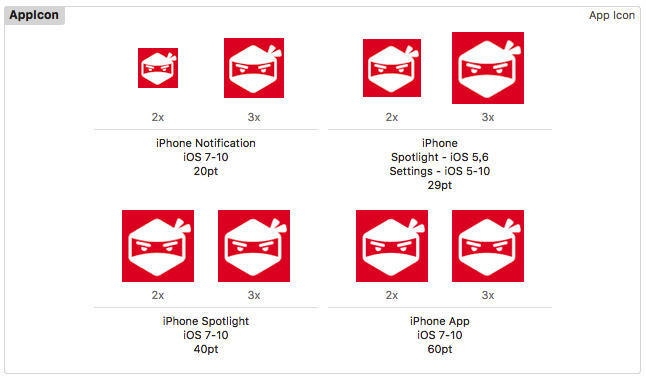
Asset catalog(资产分类) 默认自动创建,名为 Assets.xcassets, 包含 AppIcon 的入口。提供了构建应用的所有需要的图标的尺寸:
LaunchImage 目录需要自己创建:鼠标右击 —— App Icons & Launch Images —— New iOS Launch Image
Custom imagesets - 自定义图像集
和标准的集合一样,你可以使用 asset catalogs 来管理你自己的图片,图片都是包含在 ImageSet 中的,并且可以使用管理对应的 retina 和非 retina 图像。
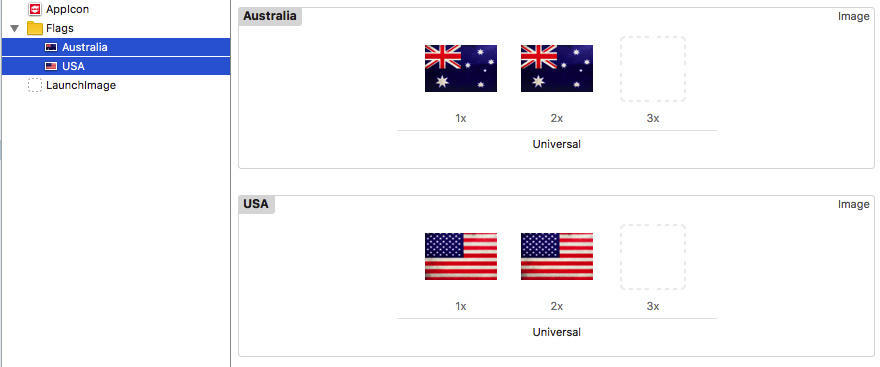
使用方法:UIImage:imageNamed:
UIImage *image = [UIImage imageNamed:@"Australia"];💡 加载图片还涉及到缓存问题,参考之前写的文章:
UIImage 使用 Tips
Slicing images - 切片图像
Asset catalogs 的另外一个主要的特性就是能够让图像进行切片工作,自从 iOS2 开始程序就能够使用切片的图像了,但是 Xcode 中的这个新特性会变得非常的简单。
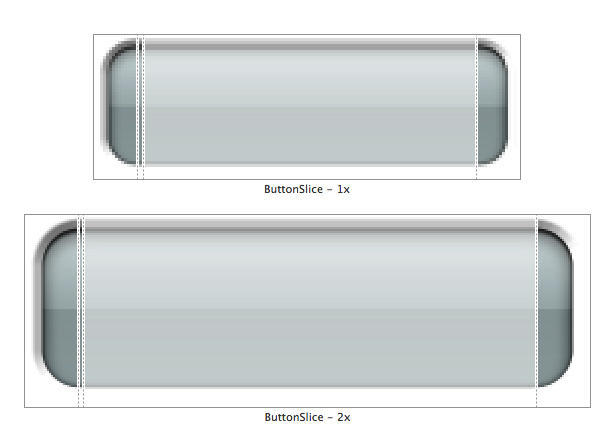
使用切片变换图像,是创建虚拟的元素基本的技术。例如按钮,需要拉伸这个按钮图片的大小达到一个新的大小,并且要设置边缘不被拉伸,只拉伸中间的部分。
在 Asset catalog 中就可以使用 Xcode 提供的功能进行切片操作了,开启切片功能,只需要点击 Show Slicing 按钮,你可以选择水平、竖直或者两者都拉伸的方式,如果你选择之后,图像将会重新加载并且上面会出现拉伸辅助线,你可以通过拖拽辅助线,来实现自己需要拉伸的效果。
使用这些切片图像编程非常的简单,和之前一样创建一个 UIImage 对象,然后当你调整 UIImageView 的大小,内部的 image 就会自动根据切片的图像来变换大小。
UIImage *btnImage = [UIImage imageNamed:@"ButtonSlice"];

// Let's make 2
UIImageView *iv = [[UIImageView alloc] initWithImage:btnImage];
iv.bounds = CGRectMake(0, 0, 150, CGRectGetHeight(iv.bounds));
iv.center = CGPointMake(CGRectGetWidth(self.view.bounds) / 2, 300);
[self.view addSubview:iv];

// And a stretched version
iv = [[UIImageView alloc] initWithImage:btnImage];
iv.bounds = CGRectMake(0, 0, 300, CGRectGetHeight(iv.bounds));
iv.center = CGPointMake(CGRectGetWidth(self.view.bounds) / 2, 350);
[self.view addSubview:iv];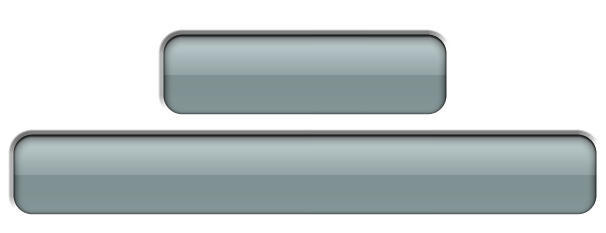
步骤详解:
- 点击
Show Slicing按钮?
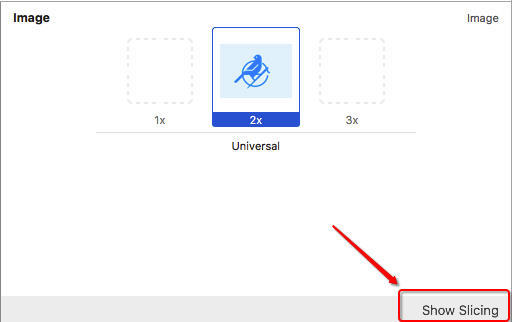
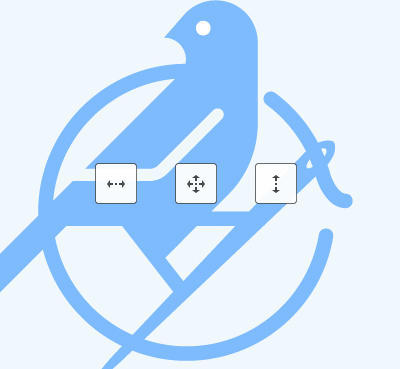
选择拉伸模式:
支持三种模式:水平拉伸、水平和垂直同时拉伸、垂直拉伸。
![]()
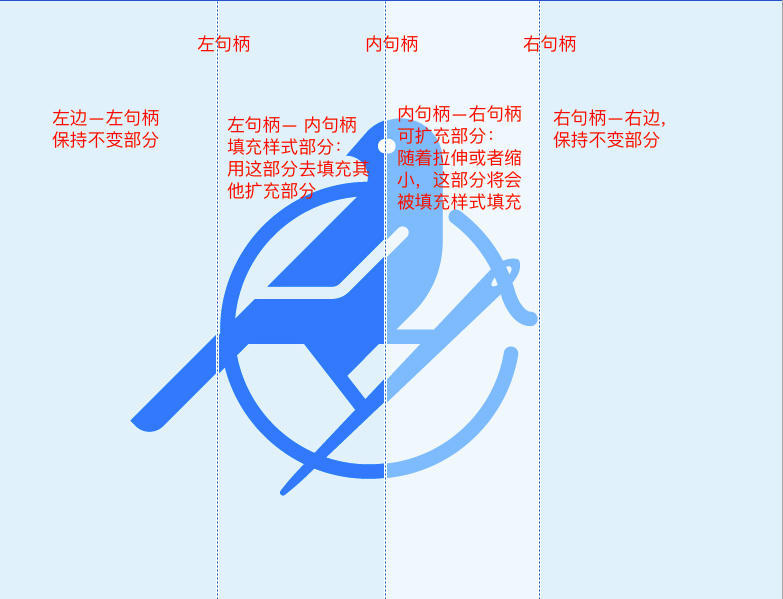
设置拉伸句柄:
![]()
代码添加图片:
<!–hexoPostRenderEscape:
UIImage *image = [UIImage imageNamed:@"bird"];
// default
UIImageView *imageView = [[UIImageView alloc] initWithImage:image];
imageView.bounds = CGRectMake(0, 0, 50, 37.5);
imageView.center = CGPointMake(CGRectGetWidth(self.view.bounds) / 2, 300);
[self.view addSubview:imageView];
// stretch:hexoPostRenderEscape–>
UIImageView *stretchImgView = [[UIImageView alloc] initWithImage:image];
stretchImgView.bounds = CGRectMake(0, 0, 100, 75);
stretchImgView.center = CGPointMake(CGRectGetWidth(self.view.bounds) / 2, 400);
[self.view addSubview:stretchImgView];
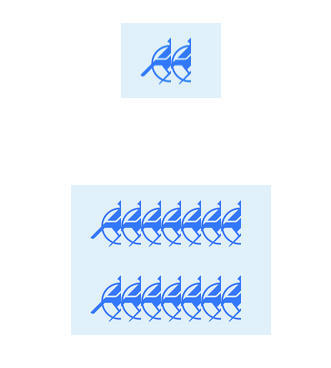
效果:用【填充部分】去覆盖【可扩展部分】
![]()
ImageOptim - 超好用的图像压缩工具
ImageOptim 是一个免费的图像压缩工具。iOS 工程默认使用 pngcrush 命令来压缩数据,不过其压缩比率不是很高。而使用 ImageOptim 可以达到最大的图片压缩效果。
实现原理:使用各种开源的图像压缩工具,然后取压缩效果最好的那一个。
使用方法也非常简单:在 Finder 中打开图片所在的文件夹,将图片拖拽进 ImageOptim 界面中即可。
其他图像压缩工具:
- Optimizilla —— 在线图像优化压缩器
附录:
摘自官方人机交互指南:iOS Human Interface Guidelines
图片大小和分辨率(Image Size and Resolution)
| 设备 | 比例系数 |
|---|---|
| iPhone 7 Plus and iPhone 6s Plus | @3x |
| 其余高分辨率的 iOS 设备 | @2x |
App Icon
| 设备或状况 | 图标大小 |
|---|---|
| iPhone | 180px × 180px (60pt × 60pt @3x) |
| 120px × 120px (60pt × 60pt @2x) | |
| iPad Pro | 167px × 167px (83.5pt × 83.5pt @2x) |
| iPad, iPad mini | 152px × 152px (76pt × 76pt @2x) |
| App Store | 1024px × 1024px |
Spotlight, Settings, and Notification Icons
Spotlight
| 设备 | Spotlight 图标大小 |
|---|---|
| iPhone | 120px × 120px (40pt × 40pt @3x) |
| 80px × 80px (40pt × 40pt @2x) | |
| iPad Pro, iPad, iPad mini | 80px × 80px (40pt × 40pt @2x) |
Settings
| 设备 | Settings 图标大小 |
|---|---|
| iPhone | 87px × 87px (29pt × 29pt @3x) |
| 58px × 58px (29pt × 29pt @2x) | |
| iPad Pro, iPad, iPad mini | 58px × 58px (29pt × 29pt @2x) |
Notification
| 设备 | Notification 图标大小 |
|---|---|
| iPhone | 60px × 60px (20pt × 20pt @3x) |
| 40px × 40px (20pt × 20pt @2x) | |
| iPad Pro, iPad, iPad mini | 40px × 40px (20pt × 20pt @2x) |
自定义图标大小
| 导航栏和工具栏图标尺寸 | 标签栏图标尺寸 | |
|---|---|---|
| 推荐 | 75px × 75px (25pt × 25pt @3x) | 75px × 75px (25pt × 25pt @3x) |
| 50px × 50px (25pt × 25pt @2x) | 50px × 50px (25pt × 25pt @2x) | |
| 最大 | 83px × 83px (27.67pt × 27.67pt @3x) | 144px × 96px (48pt × 32pt @3x) |
| 56px × 56px (28pt × 28pt @2x) | 96px × 64px (48pt × 32pt @2x) |
启动画面(Launch Screen)
静态启动画面图片
| 设备 | Portrait size | Landscape size |
|---|---|---|
| iPhone 7 Plus, iPhone 6s Plus | 1242px × 2208px | 2208px × 1242px |
| iPhone 7, iPhone 6s | 750px × 1334px | 1334px × 750px |
| iPhone SE | 640px × 1136px | 1136px × 640px |
| 12.9-inch iPad Pro | 2048px × 2732px | 2732px × 2048px |
| 9.7-inch iPad Pro, iPad Air 2, iPad mini 4, iPad mini 2 | 1536px × 2048px | 2048px × 1536px |
